Thursday, May 22, 2014

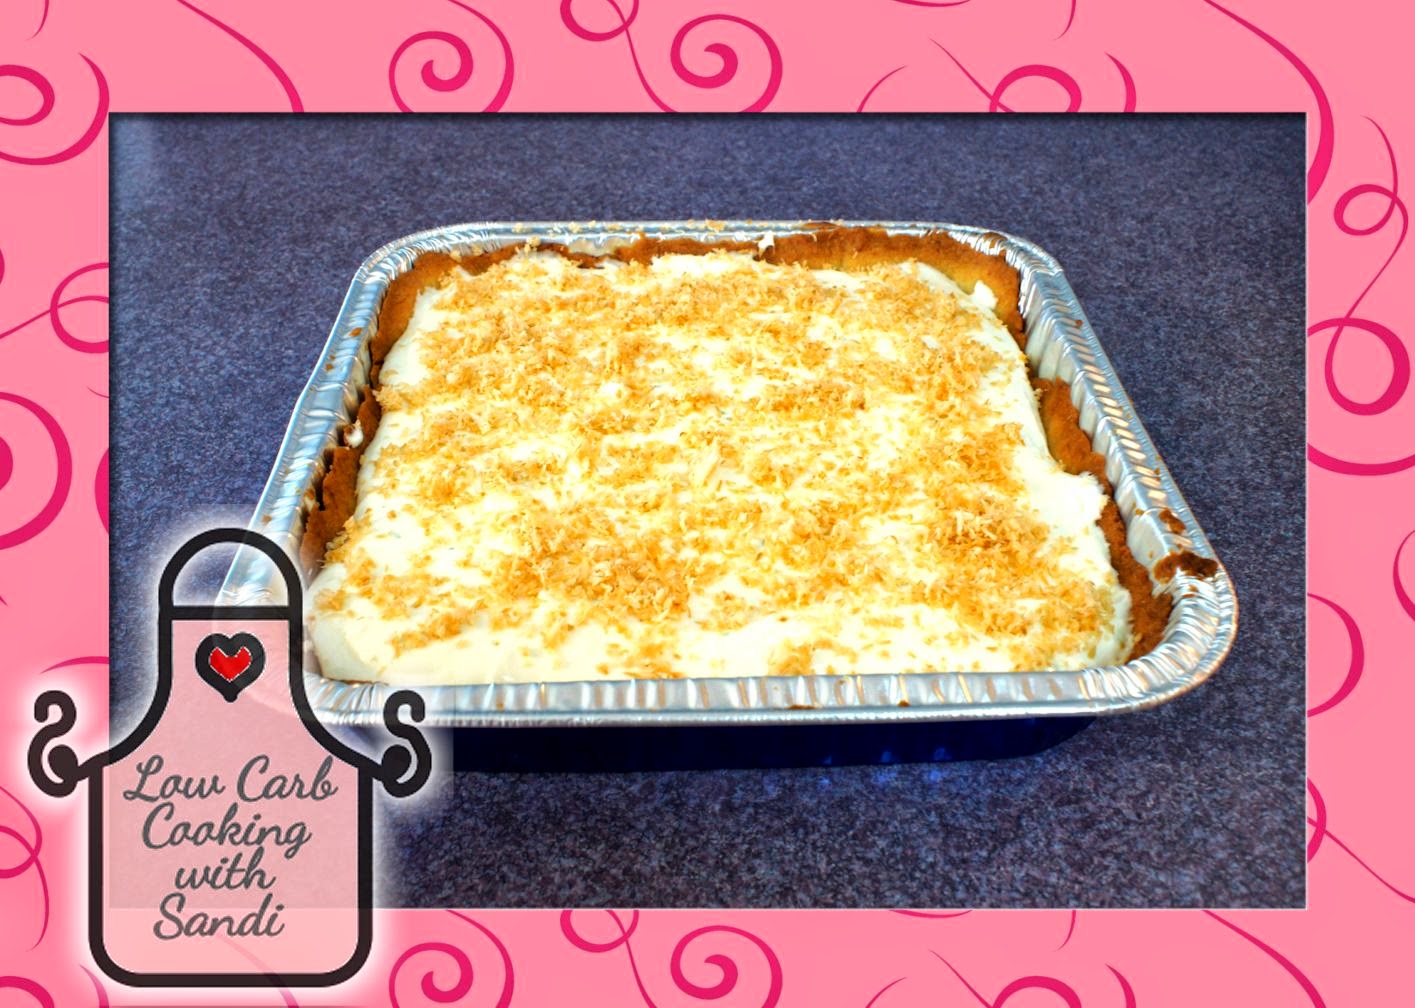
Coconut Lime Cream Cheese Squares - Low Carb


On May 3rd, we went to a Kentucky Derby party at our nephew's house. Besides bringing my low carb Maple Walnut Chocolate Chip Biscotti (recipe not updated yet) we also brought this low carb dessert. I could have made a pie, but since there were a lot of people I went with squares and cut 16 small pieces out of this 8 by 8 pan. I cut them in 4 one direction, then turned the pan and cut into another 4 pieces.


PIE CRUST:
  • 1 cup blanched almond flour (Honeyville)
  • 1/4 cup Bob's Red Mill Gluten-Free All Purpose Baking Flour
  • 2 Tbsp Swerve granulated sweetener or granulated erythritol
  • 1 tsp guar or xanthan gum
  • 1/4 tsp salt
  • 1/4 cup butter, well-chilled and cut into small chunks
  • 2 to 4 Tbsp ice water
Directions
1.     Preheat oven to 350°F.
2.     For the crust, combine almond flour, GF all purpose flour, Swerve, xanthan gum, and salt, in a food processor. Pulse to combine.
3.     Sprinkle butter in, and pulse until mixture resembles coarse crumbs.
4.     With processor running on low, add ice water 1 tablespoon at a time, until dough begins to clump together. 2 Tbs worked for me.
5.     Cover work surface with a large sheet of parchment paper and sprinkle with almond flour. Turn out dough and form into a square (or disk for a pie).
6.     Sprinkle with additional almond flour and top with another piece of parchment, then carefully roll out in all directions to form a 9 by 9 inch square (or 10-inch circle for a pie).
7.     Place in 8 by 8 pan (or a pie tin).
8.     Poke some holes in the bottom of crust with a fork.
9.     Bake 13 to 15 minutes. If you can cover the crust edges with foil after they have browned, you can add more time to let the bottom of the crust get slightly brown. Cool on rack when done. 

Ingredients for Filling
  • 12 oz cream cheese (full fat) room temperature 
  • 1 Lime, juiced 
  • 9 Tbsps Swerve or granular erythritol 
  • 3/4 cup heavy whipping cream
Directions
1.     In a bowl, beat the cream cheese, lime juice, and sweetener, with a hand mixer until smooth.
2.     In a separate bowl, whip the heavy whipping cream.
3.     Fold the whipped cream into the cream cheese mixture.
4.     Scoop into the cooled down crust. Refrigerate for 2 hours or more.

Optional:
Top with toasted coconut before refrigerating. On a sheet pan, spread out 1/4 cup of unsweetened fine coconut. Toast for 2 to 3 minutes in a 350° oven. Be careful not to burn the coconut. Remove from oven and let it cool. After it has cooled, place in a bowl and add 1 to 2 tablespoons of cold water and mix until moist. Add 1 teaspoon of powdered erythritol and 1 drop of E-Z Sweetz liquid sucralose and mix well. Whatever amount doesn't get used, keep the remainder in an airtight container in the refrigerator.

Notes
Total carbs is 33.6g for the entire recipe. If cutting into 16 squares, each square would be 2.1g. If making a pie and cutting into 8 slices, the carb count would be 4.2g per slice.


To print this recipe, follow the instructions on my sidebar and go to Print Friendly!

Thursday, May 8, 2014

Cheese Crookies


You're probably thinking, what the heck is a 'Crookie'? It's my version of a cross between a cracker and a cookie. It has the texture and taste of a cheese cracker, but the look and shape of a cookie. I intend on modifying the shape to be square and flatter, and then it will be a true cracker. The taste of these are awesome, so cheesy!
I adapted a recipe from Trisha Yearwood's Cheese Straws on the Food Network. I tried her method of using a cookie dough press, but the mixture was just too dense and difficult to work with in a press. Next time I make these I'll make some adjustments to get them to work in the press. I went out and bought one specifically for this recipe. I might have to resort to just using it for cookies.

Ingredients:
15 ozs. of shredded sharp cheddar room temperature (or Colby Jack)
1/2 cup butter softened
2 cups Jen's bake mix (Splendid Gluten-free Bake Mix 3)
1/4 tsp. xanthan gum
3/4 tsp. salt
pinch pepper
pinch cayenne
pinch paprika
pinch garlic powder

Directions:
Preheat oven to 325°F.
Put the softened cheese and butter in the bowl of a stand mixer. Using the paddle attachment, beat it for 15 to 30 minutes.
In a medium bowl, sift 1 and 1/2 cups of Jen's bake mix with all of the spices. Gradually add the seasoned flour to the cheese mixture by large spoonfuls, beating well after each addition. Now, gradually add the remaining 1/2 cup of the unseasoned bake mix until the dough is somewhat stiff but still soft enough to the touch. You will not need to add all of the bake mix. I ended up using only 1/4 cup and returned the balance to its canister.
I use non-stick parchment paper in my trays. With this amount you might need 3 or 4 trays. Bake at 325° for 15 to 20 minutes. Any thin areas will bake quicker and probably burn, so be careful to have consistent thickness.
I rolled the dough into 1/4 inch balls and flattened them with a fork. I may adjust this recipe to be softer to be put into a cookie press to make cheese straws, or fill a plastic bag and cut the tip to pipe the dough on.

Yield: 110 Crookies
Serving Size: 5 Crookies are 2g  net carbs.

Optional: Sprinkle some salt on them as soon as they are out of the oven.


To print this recipe, follow the instructions on my sidebar and go to Print Friendly!

Saturday, April 19, 2014

Mushroom Saute with Wine (REVISED)


I've been making this side dish for many years, often with a few tweaks here and there. My Mom used to make this, and I could never get enough of it. She wasn't Italian, but could cook as good as any other Italian in my Dad's family!
I'm pretty sure that she used a Red Wine that my Grandfather made in his wine cellar, but I'm using a Merlot wine. So, I would assume that any dry red wine would work here. I have such great memories playing under my Grandfather's grape vine that provided a shady place out of the sun. My grandparents had the biggest vegetable garden that I had ever seen for a residential area. Grandma grew tomatoes (the best taste ever!), green beans, eggplant, and they had a fig tree. I'm sure there were other vegetables but I can't remember them all. I remember the chicken coop, and still have disturbing memories when Grandma slaughtered the chickens. If my memory is correct, the hens in the coop were for laying eggs. She went on a bus into Paterson, New Jersey to get live chickens, that would later become dinner.
Grandma made the best pizza from scratch, topped with her crushed tomatoes, fresh garlic, and some freshly grated Locatelli Peccorino Romano cheese. Sometimes she would add some anchovies, yum! There was NO mozzarella on her pizza anywhere, and it really didn't need it. Everything she made was from scratch, and a lot of it came from her garden.
Okay, moving on to today's recipe!

Ingredients:
an 8oz. pack of Baby Bella OR White mushrooms sliced
1 Tbsp Extra Virgin Olive Oil (Extra Light)
1 Tbsp Butter (REVISED)
1/4 tsp Fine Sea Salt
1/8 tsp ground black pepper
1/8 tsp garlic powder
1/8 tsp crushed red pepper flakes (or less)
1/2 cup Merlot wine

Directions:
First thing is to make sure your mushrooms are cleaned. Add olive oil and butter to a medium saute or frying pan. Have the burner set to medium high heat and add the mushrooms to the pan. Toss them with tongs for about 2 minutes. Lower the flame to medium. Next, add the salt, pepper, and garlic powder, then toss the mushrooms to distribute the spices. Add the crushed red pepper and toss again to mix. Finally, add the Merlot wine (or any dry red), turn the heat up to high until the wine has cooked off. Keep tossing and coating the mushrooms with the wine until the wine has completely disappeared. That's it!

I have always winged it with the spices before measuring them out today. I adjusted the final measurements in the Ingredients list above. I didn't have enough salt (for my taste), and the red pepper was so hot on my tongue that I cut that back. Even the wine wasn't enough, but like I said the amounts have been adjusted in the Ingredients.
I like to have this as a side along with my morning scrambled eggs. It is also a good side for some beef dishes. Since I'm the only one that eats mushrooms in my house (hubby doesn't like them at all), I only used the one pack of mushrooms. If you have a bigger family, go ahead and double or triple them, but you will need a bigger pan.

Notes:
Adding butter to the oil in the frying pan has made this an irresistible side dish! Once I tasted them, I couldn't stop eating them and I ate the whole bunch of mushrooms!! 
Based on the ingredients used the entire recipe is approximately 4.5g net carbs. It should give you around 1 and 1/2 cups of mushrooms for the full recipe.
Serving size = 1/2 cup with 1.5g net carbs


To print this recipe, follow the instructions on my sidebar and go to Print Friendly!

Wednesday, March 12, 2014

"Not So Impossible" Coconut Pie


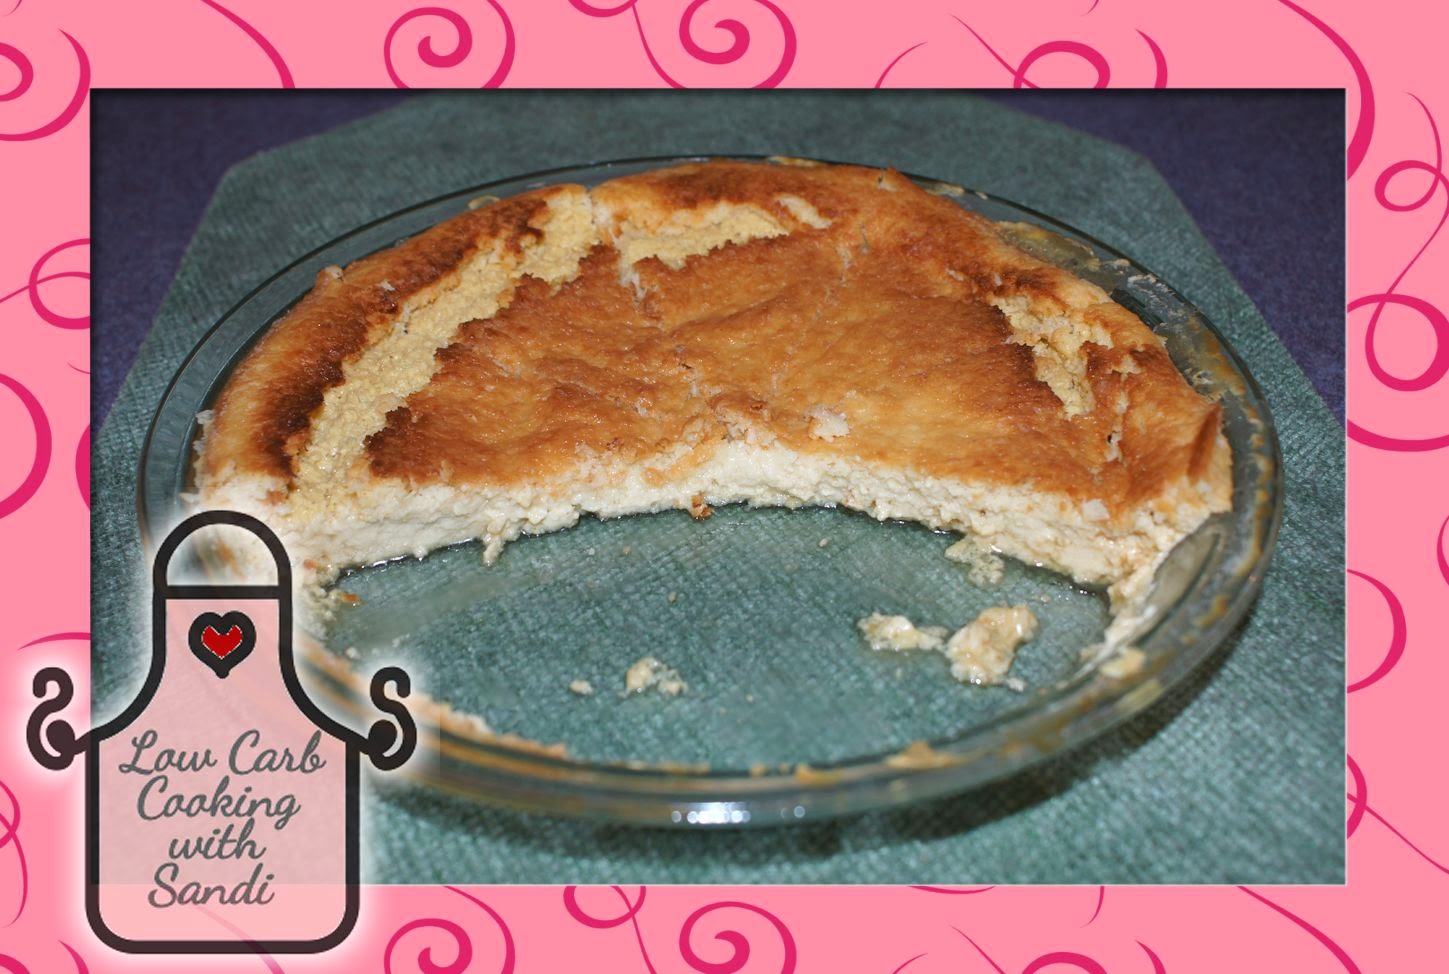
Five slices remain after my husband, Frank, got a taste of it. I had 1 slice, and he had 2!
This morning when I went into the kitchen, I saw a note from Frank with a happy face ☺saying "The pie was GREAT!". To get a note, he must really like it!!
He's my recipe tester, if he likes it, everybody will like it. He's very difficult when it comes to eating healthy, the low-carb way, but he's slowly getting there.
I adapted this recipe from Barbo's Kitchen (a friend of Jennifer Eloff). I tried it a couple of days ago by making 1/2 the recipe and putting them in a muffin tin. They tasted good, so I knew I would be making it again really soon, but in a pie plate with the full recipe.
My sister reminded me that our Mom used to make the original Impossible Pie using Bisquick mix. I do remember eating it, but cannot recall how it was made.
At 1.2g carbs per serving, my version works really well as a low carb dessert!

INGREDIENTS:
1 cup of Better than Eggs (or 4 eggs)
3 Tbsp melted butter
3/4 cup of heavy whipping cream
1 and 1/4 cup of water
a Pinch of Sea Salt
1/4 cup Biscuit Mix from LC Foods Corp
1/4 tsp Liquid Sweetener (I used E-Z Sweetz liquid Sucralose)
2 tsp vanilla
3/4 cup unsweetened finely grated coconut

DIRECTIONS:
Preheat oven to 350° F.
Using a blender, put all EXCEPT the coconut in and mix until smooth. Add the coconut and stir into batter. Spray a  9" pie plate with a cooking spray. Pour the batter into the greased pie dish and bake for 50 to 60 minutes, or until custard in the center is firm.
Once it's cooled down, place it in the refrigerator to store it. Whipped Cream goes nicely on a slice of this pie!

Notes:
The entire pie is 9.5g carbs, based on the ingredients that I used.
If you slice into 8 servings, each serving would be approximately 1.2g carbs.


To print this recipe, follow the instructions on my sidebar and go to Print Friendly!

Monday, December 23, 2013

Low Carb Snow Drops


I can easily get carried away with eating these cookies, they are that good!! The original recipe is in 'Low-Carbing Among Friends Volume-4' cookbook. You can find it on page 139.
I subbed the flours, and went with Jennifer Eloff's Bake mix version 2. However, I did not add the gelatin or the xanthan gum.  The cookies turned out just fine without either of them.


Sunday, December 1, 2013

Low Carb Black Forest Cheesecake Cupcakes


This came out better than I had expected! I don't know if it should be called Black Forest, since I think that uses cherries on top. Mine has strawberry preserves, reduced on the stove of course. Maybe it should be called 'Toms River Black Forest Cheesecake Cupcakes', just kidding!
The original recipe is from Cooking Classy.
My friend, Judy Bennett, had posted it on a Facebook group page 'My favorite recipe's'. So I set out to reformulate this to be low carb, as much as possible. *Some ingredients that I used were Reduced Fat, but you could use the full fat and end up with slightly less carbs. ALSO, I have eliminated the crust portion of the original recipe.

Ingredients:
CHEESECAKE
3 ounces Baker's unsweetened chocolate (for the melted chocolate part of recipe)
5 Tablespoons of granulated Swerve (for the melted chocolate part of recipe)
5 Tablespoons of Heavy Whipping Cream (for the melted chocolate part of recipe)
1/2 cup + 1 Tablespoon of granulated Swerve
2 Tablespoons of unsweetened cocoa powder (sifted)
1 pinch of salt
12 ounces of cream cheese, softened well (Reduced Fat)
2 large eggs
1 teaspoon vanilla extract
1/4 cup heavy whipping cream
1/4 cup of sour cream (Reduced Fat)

WHIPPED TOPPING
1 + 1/4 cups heavy whipping cream
1 + 1/2 Tablespoons granulated Swerve

FRUIT TOPPING
3 Tablespoons Polaner Sugar-Free + Fiber Strawberry Preserves
Splash of heavy whipping cream

Directions:
FOR THE CHEESECAKE FILLING
Preheat oven to 325° F.
In a mixing bowl, whisk together 1/2 cup + 1 Tbsp Swerve, sifted cocoa, and salt, until no clumps of cocoa remain. There shouldn't be any since you sifted the cocoa! Add cream cheese to a mixing bowl and pour sweetener mixture over cream cheese, then using an electric hand mixer set on low speed, whip mixture just until smooth. Mix in eggs one at a time, blending just until combined after each addition and adding in vanilla with second egg. Let that sit while you melt your chocolate. Put the Baker's chocolate in a small saucepan over a low flame. Keep stirring while it's melting. Add the 5 Tbsp of Swerve and stir it well to incorporate. Once it's melted and mixed well, add the 5 Tbsp heavy whipping cream until smooth. Let it cool slightly, then add to the ingredients already mixed. Mix until just combined, then add 1/4 cup heavy whipping cream and sour cream and mix just until combined. Forcefully tap bowl against the countertop, about 30 times to release some of the air bubbles. Divide mixture among 12 cupcake liners in a muffin pan, adding a slightly heaping 1/4 cup to each. I highly recommend the liners I use from If You Care and look for the Where to Buy link at the top of their page. Bake in 325° F oven 17 - 21 minutes until centers only jiggle slightly. (My oven was the full 21 minutes). Remove from oven and allow to cool at room temperature 1 hour, then cover with plastic wrap and refrigerate 2 hours.

FOR THE WHIPPED TOPPING
Note - It's preferably best to add the whipped topping 2 hours before serving.
In a mixing bowl, using an electric hand mixer, 1 + 1/4 cups of heavy whipping cream until soft peaks form, then add 1 + 1/2 Tbsp of Swerve and whip until stiff peaks form. Pipe or spread the whipped cream into an even layer over the cupcakes, then pipe a rim around edge over that layer (or if spreading whipped cream, just create a small well into the center).

FOR THE FRUIT TOPPING
Let this cool before adding on top of the whipped cream layer.
Place 3 Tbsp of the strawberry preserves into a small saucepan. Heat over low flame until it starts to slightly liquefy. Leave some of the strawberry chunks solid. Turn off the flame and put a splash of heavy whipping cream in and mix well. Once this is cool, spoon a heaping teaspoon into the center of each. Store in the refrigerator in an airtight container.

Notes:
Total carb count for entire recipe based on *my ingredients used is 42g net carbs. YIELD: 12 cupcakes, 3.5g net carbs per cupcake.


To print this recipe, follow the instructions on my sidebar and go to Print Friendly!

Peanut Butter Chocolate Balls


Super easy, super good, and Low Carb!! The original recipe from Taste of Home is titled 'Peanut Butter Snowballs' using white chocolate. I don't have any sugar-free white chocolate, so I figured mine would be more like a Reese's Peanut Butter Cup. They are, but they are so much better!!
My friend, Judy Bennett, had the original recipe posted on a Facebook group 'My favorite recipe's'.

Ingredients:
1/2 cup chunky Peanut Butter (Smucker's Natural)
3 Tablespoons softened butter (super softened!)

Directions:
In a bowl, combine the sweetener, peanut butter, and butter. Since I use natural peanut butter, I had to put my mixture into the refrigerator until it was firm enough to form balls. I think an hour is good enough, if it's not forming balls easily put it back in the refrigerator for some more time.
When firm enough, form the balls, maybe 3/4 to 1 inch and place on waxed paper-lined cookie sheet. Chill for 30 minutes or until nice and firm.
Next, melt the chocolate in a microwave-safe bowl. Heat on high at 30-second intervals, stirring each time until melted. Using two forks, dip balls and place on waxed paper to harden.
I have mine stored in the refrigerator at all times.
You should be able to get at least 18 to 24.

Notes:
Total carbs for the ingredients I used is 18g net carbs. This should give you 1g or less per ball depending on how many you get out of this recipe.


To print this recipe, follow the instructions on my sidebar and go to Print Friendly!