Showing posts with label Low Carb. Show all posts

Saturday, August 6, 2016

Sausage, Onion, and Cheese Mini Biscuit Thingy


I adapted this recipe from one of Jennifer Eloff's recipes. They remind me of mini biscuits, but not quite as dense as a biscuit. These taste great reheated in a toaster oven. Here is my spin on the recipe.

INGREDIENTS:
  • 2 cups of grated Mozzarella cheese
  • 1 1/4 cups Gluten-Free Bake Mix 2 (click for bake mix recipe)
  • 6+ heaping Tbsps. of grated Peccorino Romano cheese
  • 1 tsp baking powder
  • 1/4 cup cooked ground Italian Sausage (I use Premio brand)
  • 1/4 cup chopped and cooked Vidallia onion (sweet onion)
  • 1/4 cup water & 1/4 cup half and half
  • 1 egg (extra large) lightly beaten
DIRECTIONS:
Preheat oven to 400°. Line 2 cookie sheets with parchment paper.

In a large bowl, combine Mozzarella, Bake Mix, Peccorino Romano cheese, and baking powder.

You could cook your ground sausage and onions ahead of time and freeze in individual freezer bags for future use. This is what I do to save time. Make sure to defrost the one you are using so that it's ready to add to recipe.

Add the cooked ground sausage and cooked onion to the dry ingredients.

In a small bowl, beat the egg with the water and half & half. Add this to the cheese mixture (the larger bowl). Combine well.

Measure 1 heaping teaspoon out onto the parchment-lined cookie sheets. I actually roll mine into balls.  I get 34 pieces (17 on each sheet).


Bake 20 minutes, or until lightly golden on top and crispy underneath. Mine baked up quickly, as you can see in the finished photo.


I store mine in the refrigerator and reheat them in a toaster oven. Yummy!

Servings: 34 (or more if smaller)
Approximate carb count is 1.8g net carbs per serving (based on 34 count)


Saturday, December 13, 2014

Low Carb Crustless Ricotta Quiche Cups


I'm changing the way my recipe photo looks. Trying something different instead of the pink swirl frame. Please let me know what you think of this newer one.
I wanted to make a crabmeat quiche that I've made before, but I couldn't find my printed recipe. So, I searched through my old wooden recipe box and found one for a Shrimp and Broccoli quiche that's made with minimal eggs and ricotta cheese. I remember it as being good and creamy. Since my husband doesn't like shrimp or broccoli, I decided to go with 2 separate bowls and make muffin cups instead of 2 pies.
In his, the ones on the left, I only put Bacon. In mine, the ones on the right, I put Bacon, Mushrooms, and Onions. You could easily use whatever veggies you want. Another meat possibility is Ham.
Total muffins were 16, but if you wanted to just make one quiche in a pie plate, a 10" plate would be required. I'm going to post the recipe for what I made today, and also for the Shrimp and Broccoli version.

INGREDIENTS:
1 cup of a diced and cooked onion (I use a sweet onion)
1 cup of diced and cooked mushrooms
6 to 8 slices of chopped crispy cooked bacon
1 cup of grated Pecorino Romano cheese
3 Jumbo eggs
1 cup of Ricotta cheese, whole milk
1 and 1/2 cups of Heavy Cream
Pinch of coarse black pepper
1/4 teaspoon of salt

DIRECTIONS:
After you have cooked your onion, mushrooms, and bacon, preheat your oven to 375°F. In a large bowl, beat your eggs with an electric hand mixer. Add the grated cheese, Ricotta cheese, and heavy cream and mix well. Add all of your cooked veggies and bacon, and mix with a spoon. I did get 16 muffins out of this, so you'll need two muffin pans. I line the wells with non-stick liners. I found that this works best because the quiche cups are very light and creamy. Otherwise, they might break apart if you decide to grease your muffin pan.
Spoon the mixture into the liners 3/4 of the way full. I would imagine that you could fill them higher. They do puff up, but once they are out of the oven and cooling on a rack, they collapse in the middle.
Place in the oven and time them for 30 to 40 minutes. Mine were done at 35 minutes. When you insert a knife in and it comes out clean, they're done. Remove from oven and place pan on a cooling rack. If not eating right away, refrigerate them after they have cooled down. When ready to eat, just reheat in the microwave at 20 seconds for 2, or 30 seconds for 3. Those are approximate microwave times.

OPTIONAL:
If making in a pie plate, use a 10" one and oven time will be 40 to 50 minutes.

SHRIMP AND BROCCOLI VARIATION:
Eliminate the veggies and bacon. Instead use 1 cup of cleaned, cooked, and chopped Shrimp + 1 cup of blanched broccoli florets + 1 teaspoon of curry powder. The balance of the recipe stays the same.

NOTES:
Total servings - 16 muffin/quiche cups 26.48g net carbs (Veggie Bacon version)
Per serving - 1.65g net carbs
Total servings - 16 muffin/quiche cups 15.9g net carbs (Shrimp and Broccoli version)
Per serving - 1g net carb


Tuesday, November 18, 2014

Low Carb Sugar Free Jello Cupcakes


I remember my Aunt Ann making a sheet cake that she poked holes in, then poured Jello on top. After it was refrigerated, whipped cream was then added. Whenever we went over to her house, it's something that I looked forward to, that Jello Poke Cake. I never knew what it was called until recently when I stumbled on a recipe through the Internet.
So, to make it low carb was easy, since I already had the cupcake recipe. For the topping I went with my Lemon Cream Cheese pie filling, instead of whipped cream. My husband, who doesn't like my low carb baked goods, loved this!
Monday night we went out to dinner with family, and I brought some of the cupcakes with me to have at their house for dessert. They all agreed that you wouldn't know that they were Low Carb!
It really makes me happy when one of my recipes is well-liked from non-low carbers.

Ingredients for the Cupcake:
1 stick of butter, softened (1/2 cup)
1/2 package of full fat cream cheese, softened (4 ounces)
1/4 tsp EZ-Sweetz Liquid Sucralose
3 Jumbo eggs
1/2 cup Liquid Egg Whites (from a carton)
2 tsps Vanilla extract
1 and 1/2 cups plus 2 Tbsp Almond Flour
1 tsp baking powder
1/8 tsp salt
Zest of a lemon to equal 1/8 tsp

Instructions:
1 - Preheat oven to 350°. Prepare your muffin pan, regular size, with cupcake liners. I use unbleached parchment liners that do not stick.
2 - With a hand-held electric mixer, beat the butter, cream cheese, and sweeteners until smooth.
3 - Add all of the remaining ingredients and mix well.
4 - Spoon mixture into the liners about 3/4 of the way full. I got 11 cupcakes out of the mix.
5 - Bake at 30 to 35 minutes. Since ovens are different, start checking at 27 minutes until the tops are golden brown.

While the cupcakes are in the oven, mix a 3-ounce box of Sugar Free Raspberry Jello with 1 cup of boiling water. Keep stirring for 2 minutes to make sure all is dissolved.
When the cupcakes are done, remove from oven and place the muffin pan on a rack. Let them cool for 10 minutes.
After they've cooled, poke holes with a fork, I hit 6 spots of the top and the cupcakes were nicely soaked with the Jello. Okay, pour (or spoon) the Jello carefully over the cupcake tops, it will seep into the holes. There might be some remaining Jello, if you want to add an equal amount of cold water, maybe you could get some servings of Jello. I dumped mine, since there wasn't a lot of it.
Refrigerate the entire pan for 30 minutes. After that time, remove them from the pan.
While the cupcakes are in the refrigerator, you could go ahead and make the Lemon Cream Cheese topping. OR you could whip up some heavy cream with a little sweetener for the tops. It's up to you.

Lemon Cream Cheese Topping:
8 ounces of full fat cream cheese at room temperature
2 Tbsp fresh lemon juice
1/2 cup of heavy whipping cream

You'll need 2 bowls, one medium sized and the other one small.
In the medium bowl, beat the cream cheese, lemon juice, and sweetener with a hand mixer until smooth.
In the small bowl, whip the heavy whipping cream to soft peaks.
Fold the whipped cream into the cream cheese mixture. (If it seems too thick, just add more of heavy cream straight into the mix. Blend with the hand mixer until you have the consistency you want)
Spoon onto the refrigerated cupcakes, after you've removed them from the muffin pan.
Place in an airtight container and keep refrigerated.

Notes:
Total servings - 11 cupcakes at 24g net carbs with Lemon Cream Cheese Topping
Per serving - 1 cupcake at 2.2g net carbs
If using whipped cream instead of the Lemon Cream Cheese Topping, the carb count drops to 1.5g net carb per serving/cupcake.


Thursday, May 22, 2014

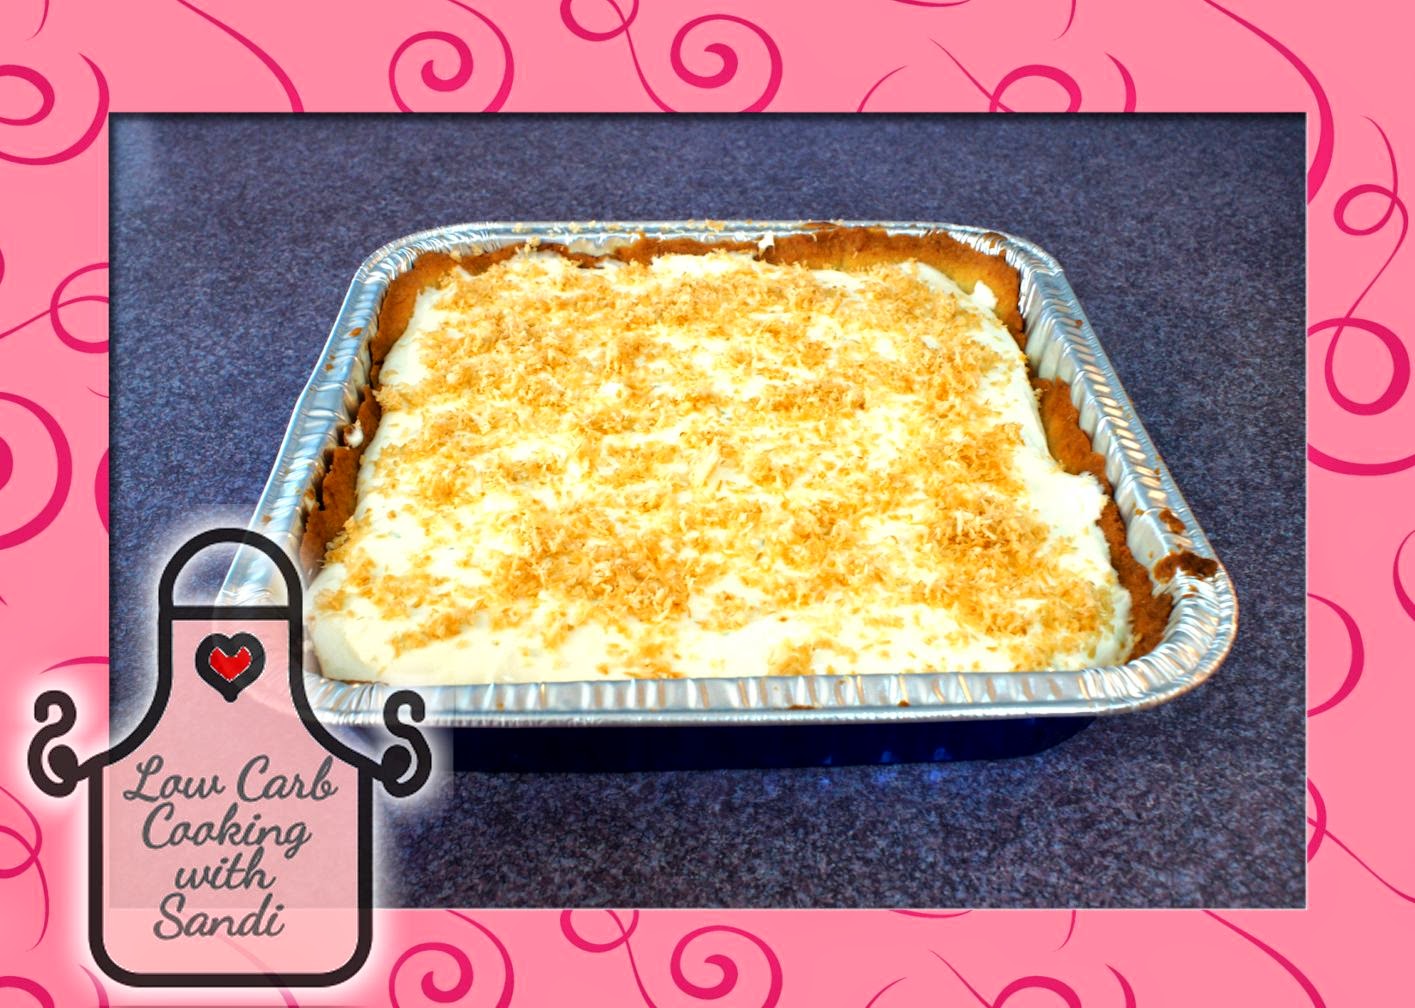
Coconut Lime Cream Cheese Squares - Low Carb


On May 3rd, we went to a Kentucky Derby party at our nephew's house. Besides bringing my low carb Maple Walnut Chocolate Chip Biscotti (recipe not updated yet) we also brought this low carb dessert. I could have made a pie, but since there were a lot of people I went with squares and cut 16 small pieces out of this 8 by 8 pan. I cut them in 4 one direction, then turned the pan and cut into another 4 pieces.


PIE CRUST:
  • 1 cup blanched almond flour (Honeyville)
  • 1/4 cup Bob's Red Mill Gluten-Free All Purpose Baking Flour
  • 2 Tbsp Swerve granulated sweetener or granulated erythritol
  • 1 tsp guar or xanthan gum
  • 1/4 tsp salt
  • 1/4 cup butter, well-chilled and cut into small chunks
  • 2 to 4 Tbsp ice water
Directions
1.     Preheat oven to 350°F.
2.     For the crust, combine almond flour, GF all purpose flour, Swerve, xanthan gum, and salt, in a food processor. Pulse to combine.
3.     Sprinkle butter in, and pulse until mixture resembles coarse crumbs.
4.     With processor running on low, add ice water 1 tablespoon at a time, until dough begins to clump together. 2 Tbs worked for me.
5.     Cover work surface with a large sheet of parchment paper and sprinkle with almond flour. Turn out dough and form into a square (or disk for a pie).
6.     Sprinkle with additional almond flour and top with another piece of parchment, then carefully roll out in all directions to form a 9 by 9 inch square (or 10-inch circle for a pie).
7.     Place in 8 by 8 pan (or a pie tin).
8.     Poke some holes in the bottom of crust with a fork.
9.     Bake 13 to 15 minutes. If you can cover the crust edges with foil after they have browned, you can add more time to let the bottom of the crust get slightly brown. Cool on rack when done. 

Ingredients for Filling
  • 12 oz cream cheese (full fat) room temperature 
  • 1 Lime, juiced 
  • 9 Tbsps Swerve or granular erythritol 
  • 3/4 cup heavy whipping cream
Directions
1.     In a bowl, beat the cream cheese, lime juice, and sweetener, with a hand mixer until smooth.
2.     In a separate bowl, whip the heavy whipping cream.
3.     Fold the whipped cream into the cream cheese mixture.
4.     Scoop into the cooled down crust. Refrigerate for 2 hours or more.

Optional:
Top with toasted coconut before refrigerating. On a sheet pan, spread out 1/4 cup of unsweetened fine coconut. Toast for 2 to 3 minutes in a 350° oven. Be careful not to burn the coconut. Remove from oven and let it cool. After it has cooled, place in a bowl and add 1 to 2 tablespoons of cold water and mix until moist. Add 1 teaspoon of powdered erythritol and 1 drop of E-Z Sweetz liquid sucralose and mix well. Whatever amount doesn't get used, keep the remainder in an airtight container in the refrigerator.

Notes
Total carbs is 33.6g for the entire recipe. If cutting into 16 squares, each square would be 2.1g. If making a pie and cutting into 8 slices, the carb count would be 4.2g per slice.


To print this recipe, follow the instructions on my sidebar and go to Print Friendly!

Thursday, May 8, 2014

Cheese Crookies


You're probably thinking, what the heck is a 'Crookie'? It's my version of a cross between a cracker and a cookie. It has the texture and taste of a cheese cracker, but the look and shape of a cookie. I intend on modifying the shape to be square and flatter, and then it will be a true cracker. The taste of these are awesome, so cheesy!
I adapted a recipe from Trisha Yearwood's Cheese Straws on the Food Network. I tried her method of using a cookie dough press, but the mixture was just too dense and difficult to work with in a press. Next time I make these I'll make some adjustments to get them to work in the press. I went out and bought one specifically for this recipe. I might have to resort to just using it for cookies.

Ingredients:
15 ozs. of shredded sharp cheddar room temperature (or Colby Jack)
1/2 cup butter softened
2 cups Jen's bake mix (Splendid Gluten-free Bake Mix 3)
1/4 tsp. xanthan gum
3/4 tsp. salt
pinch pepper
pinch cayenne
pinch paprika
pinch garlic powder

Directions:
Preheat oven to 325°F.
Put the softened cheese and butter in the bowl of a stand mixer. Using the paddle attachment, beat it for 15 to 30 minutes.
In a medium bowl, sift 1 and 1/2 cups of Jen's bake mix with all of the spices. Gradually add the seasoned flour to the cheese mixture by large spoonfuls, beating well after each addition. Now, gradually add the remaining 1/2 cup of the unseasoned bake mix until the dough is somewhat stiff but still soft enough to the touch. You will not need to add all of the bake mix. I ended up using only 1/4 cup and returned the balance to its canister.
I use non-stick parchment paper in my trays. With this amount you might need 3 or 4 trays. Bake at 325° for 15 to 20 minutes. Any thin areas will bake quicker and probably burn, so be careful to have consistent thickness.
I rolled the dough into 1/4 inch balls and flattened them with a fork. I may adjust this recipe to be softer to be put into a cookie press to make cheese straws, or fill a plastic bag and cut the tip to pipe the dough on.

Yield: 110 Crookies
Serving Size: 5 Crookies are 2g  net carbs.

Optional: Sprinkle some salt on them as soon as they are out of the oven.


To print this recipe, follow the instructions on my sidebar and go to Print Friendly!

Saturday, April 19, 2014

Mushroom Saute with Wine (REVISED)


I've been making this side dish for many years, often with a few tweaks here and there. My Mom used to make this, and I could never get enough of it. She wasn't Italian, but could cook as good as any other Italian in my Dad's family!
I'm pretty sure that she used a Red Wine that my Grandfather made in his wine cellar, but I'm using a Merlot wine. So, I would assume that any dry red wine would work here. I have such great memories playing under my Grandfather's grape vine that provided a shady place out of the sun. My grandparents had the biggest vegetable garden that I had ever seen for a residential area. Grandma grew tomatoes (the best taste ever!), green beans, eggplant, and they had a fig tree. I'm sure there were other vegetables but I can't remember them all. I remember the chicken coop, and still have disturbing memories when Grandma slaughtered the chickens. If my memory is correct, the hens in the coop were for laying eggs. She went on a bus into Paterson, New Jersey to get live chickens, that would later become dinner.
Grandma made the best pizza from scratch, topped with her crushed tomatoes, fresh garlic, and some freshly grated Locatelli Peccorino Romano cheese. Sometimes she would add some anchovies, yum! There was NO mozzarella on her pizza anywhere, and it really didn't need it. Everything she made was from scratch, and a lot of it came from her garden.
Okay, moving on to today's recipe!

Ingredients:
an 8oz. pack of Baby Bella OR White mushrooms sliced
1 Tbsp Extra Virgin Olive Oil (Extra Light)
1 Tbsp Butter (REVISED)
1/4 tsp Fine Sea Salt
1/8 tsp ground black pepper
1/8 tsp garlic powder
1/8 tsp crushed red pepper flakes (or less)
1/2 cup Merlot wine

Directions:
First thing is to make sure your mushrooms are cleaned. Add olive oil and butter to a medium saute or frying pan. Have the burner set to medium high heat and add the mushrooms to the pan. Toss them with tongs for about 2 minutes. Lower the flame to medium. Next, add the salt, pepper, and garlic powder, then toss the mushrooms to distribute the spices. Add the crushed red pepper and toss again to mix. Finally, add the Merlot wine (or any dry red), turn the heat up to high until the wine has cooked off. Keep tossing and coating the mushrooms with the wine until the wine has completely disappeared. That's it!

I have always winged it with the spices before measuring them out today. I adjusted the final measurements in the Ingredients list above. I didn't have enough salt (for my taste), and the red pepper was so hot on my tongue that I cut that back. Even the wine wasn't enough, but like I said the amounts have been adjusted in the Ingredients.
I like to have this as a side along with my morning scrambled eggs. It is also a good side for some beef dishes. Since I'm the only one that eats mushrooms in my house (hubby doesn't like them at all), I only used the one pack of mushrooms. If you have a bigger family, go ahead and double or triple them, but you will need a bigger pan.

Notes:
Adding butter to the oil in the frying pan has made this an irresistible side dish! Once I tasted them, I couldn't stop eating them and I ate the whole bunch of mushrooms!! 
Based on the ingredients used the entire recipe is approximately 4.5g net carbs. It should give you around 1 and 1/2 cups of mushrooms for the full recipe.
Serving size = 1/2 cup with 1.5g net carbs


To print this recipe, follow the instructions on my sidebar and go to Print Friendly!

Wednesday, March 12, 2014

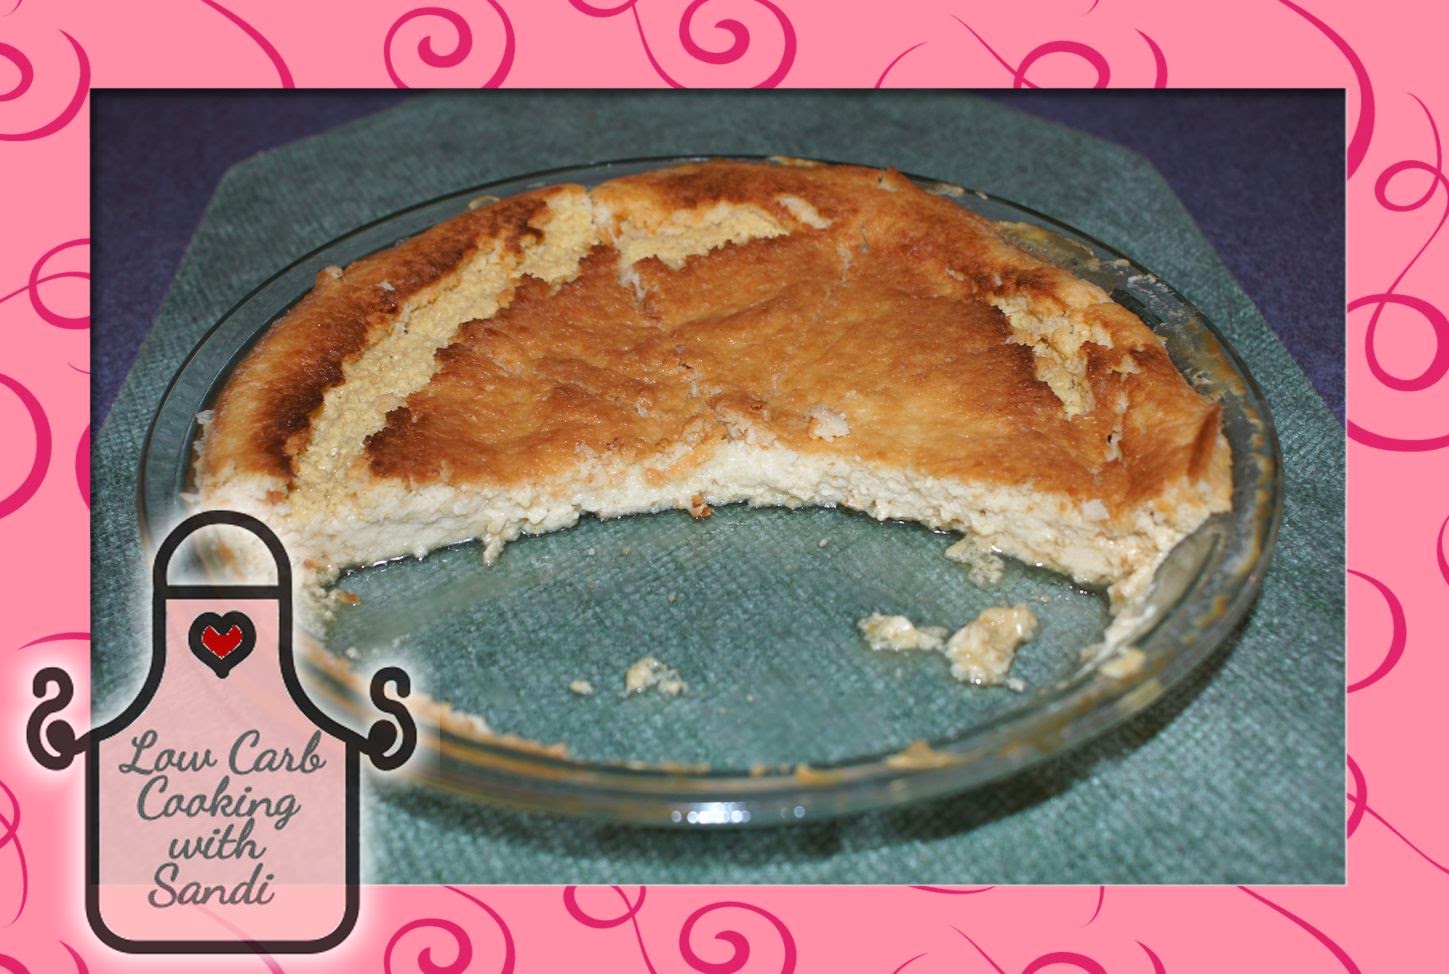
"Not So Impossible" Coconut Pie


Five slices remain after my husband, Frank, got a taste of it. I had 1 slice, and he had 2!
This morning when I went into the kitchen, I saw a note from Frank with a happy face ☺saying "The pie was GREAT!". To get a note, he must really like it!!
He's my recipe tester, if he likes it, everybody will like it. He's very difficult when it comes to eating healthy, the low-carb way, but he's slowly getting there.
I adapted this recipe from Barbo's Kitchen (a friend of Jennifer Eloff). I tried it a couple of days ago by making 1/2 the recipe and putting them in a muffin tin. They tasted good, so I knew I would be making it again really soon, but in a pie plate with the full recipe.
My sister reminded me that our Mom used to make the original Impossible Pie using Bisquick mix. I do remember eating it, but cannot recall how it was made.
At 1.2g carbs per serving, my version works really well as a low carb dessert!

INGREDIENTS:
1 cup of Better than Eggs (or 4 eggs)
3 Tbsp melted butter
3/4 cup of heavy whipping cream
1 and 1/4 cup of water
a Pinch of Sea Salt
1/4 cup Biscuit Mix from LC Foods Corp
1/4 tsp Liquid Sweetener (I used E-Z Sweetz liquid Sucralose)
2 tsp vanilla
3/4 cup unsweetened finely grated coconut

DIRECTIONS:
Preheat oven to 350° F.
Using a blender, put all EXCEPT the coconut in and mix until smooth. Add the coconut and stir into batter. Spray a  9" pie plate with a cooking spray. Pour the batter into the greased pie dish and bake for 50 to 60 minutes, or until custard in the center is firm.
Once it's cooled down, place it in the refrigerator to store it. Whipped Cream goes nicely on a slice of this pie!

Notes:
The entire pie is 9.5g carbs, based on the ingredients that I used.
If you slice into 8 servings, each serving would be approximately 1.2g carbs.


To print this recipe, follow the instructions on my sidebar and go to Print Friendly!

Monday, December 23, 2013

Low Carb Snow Drops


I can easily get carried away with eating these cookies, they are that good!! The original recipe is in 'Low-Carbing Among Friends Volume-4' cookbook. You can find it on page 139.
I subbed the flours, and went with Jennifer Eloff's Bake mix version 2. However, I did not add the gelatin or the xanthan gum.  The cookies turned out just fine without either of them.


Sunday, December 1, 2013

Low Carb Black Forest Cheesecake Cupcakes


This came out better than I had expected! I don't know if it should be called Black Forest, since I think that uses cherries on top. Mine has strawberry preserves, reduced on the stove of course. Maybe it should be called 'Toms River Black Forest Cheesecake Cupcakes', just kidding!
The original recipe is from Cooking Classy.
My friend, Judy Bennett, had posted it on a Facebook group page 'My favorite recipe's'. So I set out to reformulate this to be low carb, as much as possible. *Some ingredients that I used were Reduced Fat, but you could use the full fat and end up with slightly less carbs. ALSO, I have eliminated the crust portion of the original recipe.

Ingredients:
CHEESECAKE
3 ounces Baker's unsweetened chocolate (for the melted chocolate part of recipe)
5 Tablespoons of granulated Swerve (for the melted chocolate part of recipe)
5 Tablespoons of Heavy Whipping Cream (for the melted chocolate part of recipe)
1/2 cup + 1 Tablespoon of granulated Swerve
2 Tablespoons of unsweetened cocoa powder (sifted)
1 pinch of salt
12 ounces of cream cheese, softened well (Reduced Fat)
2 large eggs
1 teaspoon vanilla extract
1/4 cup heavy whipping cream
1/4 cup of sour cream (Reduced Fat)

WHIPPED TOPPING
1 + 1/4 cups heavy whipping cream
1 + 1/2 Tablespoons granulated Swerve

FRUIT TOPPING
3 Tablespoons Polaner Sugar-Free + Fiber Strawberry Preserves
Splash of heavy whipping cream

Directions:
FOR THE CHEESECAKE FILLING
Preheat oven to 325° F.
In a mixing bowl, whisk together 1/2 cup + 1 Tbsp Swerve, sifted cocoa, and salt, until no clumps of cocoa remain. There shouldn't be any since you sifted the cocoa! Add cream cheese to a mixing bowl and pour sweetener mixture over cream cheese, then using an electric hand mixer set on low speed, whip mixture just until smooth. Mix in eggs one at a time, blending just until combined after each addition and adding in vanilla with second egg. Let that sit while you melt your chocolate. Put the Baker's chocolate in a small saucepan over a low flame. Keep stirring while it's melting. Add the 5 Tbsp of Swerve and stir it well to incorporate. Once it's melted and mixed well, add the 5 Tbsp heavy whipping cream until smooth. Let it cool slightly, then add to the ingredients already mixed. Mix until just combined, then add 1/4 cup heavy whipping cream and sour cream and mix just until combined. Forcefully tap bowl against the countertop, about 30 times to release some of the air bubbles. Divide mixture among 12 cupcake liners in a muffin pan, adding a slightly heaping 1/4 cup to each. I highly recommend the liners I use from If You Care and look for the Where to Buy link at the top of their page. Bake in 325° F oven 17 - 21 minutes until centers only jiggle slightly. (My oven was the full 21 minutes). Remove from oven and allow to cool at room temperature 1 hour, then cover with plastic wrap and refrigerate 2 hours.

FOR THE WHIPPED TOPPING
Note - It's preferably best to add the whipped topping 2 hours before serving.
In a mixing bowl, using an electric hand mixer, 1 + 1/4 cups of heavy whipping cream until soft peaks form, then add 1 + 1/2 Tbsp of Swerve and whip until stiff peaks form. Pipe or spread the whipped cream into an even layer over the cupcakes, then pipe a rim around edge over that layer (or if spreading whipped cream, just create a small well into the center).

FOR THE FRUIT TOPPING
Let this cool before adding on top of the whipped cream layer.
Place 3 Tbsp of the strawberry preserves into a small saucepan. Heat over low flame until it starts to slightly liquefy. Leave some of the strawberry chunks solid. Turn off the flame and put a splash of heavy whipping cream in and mix well. Once this is cool, spoon a heaping teaspoon into the center of each. Store in the refrigerator in an airtight container.

Notes:
Total carb count for entire recipe based on *my ingredients used is 42g net carbs. YIELD: 12 cupcakes, 3.5g net carbs per cupcake.


To print this recipe, follow the instructions on my sidebar and go to Print Friendly!

Friday, November 29, 2013

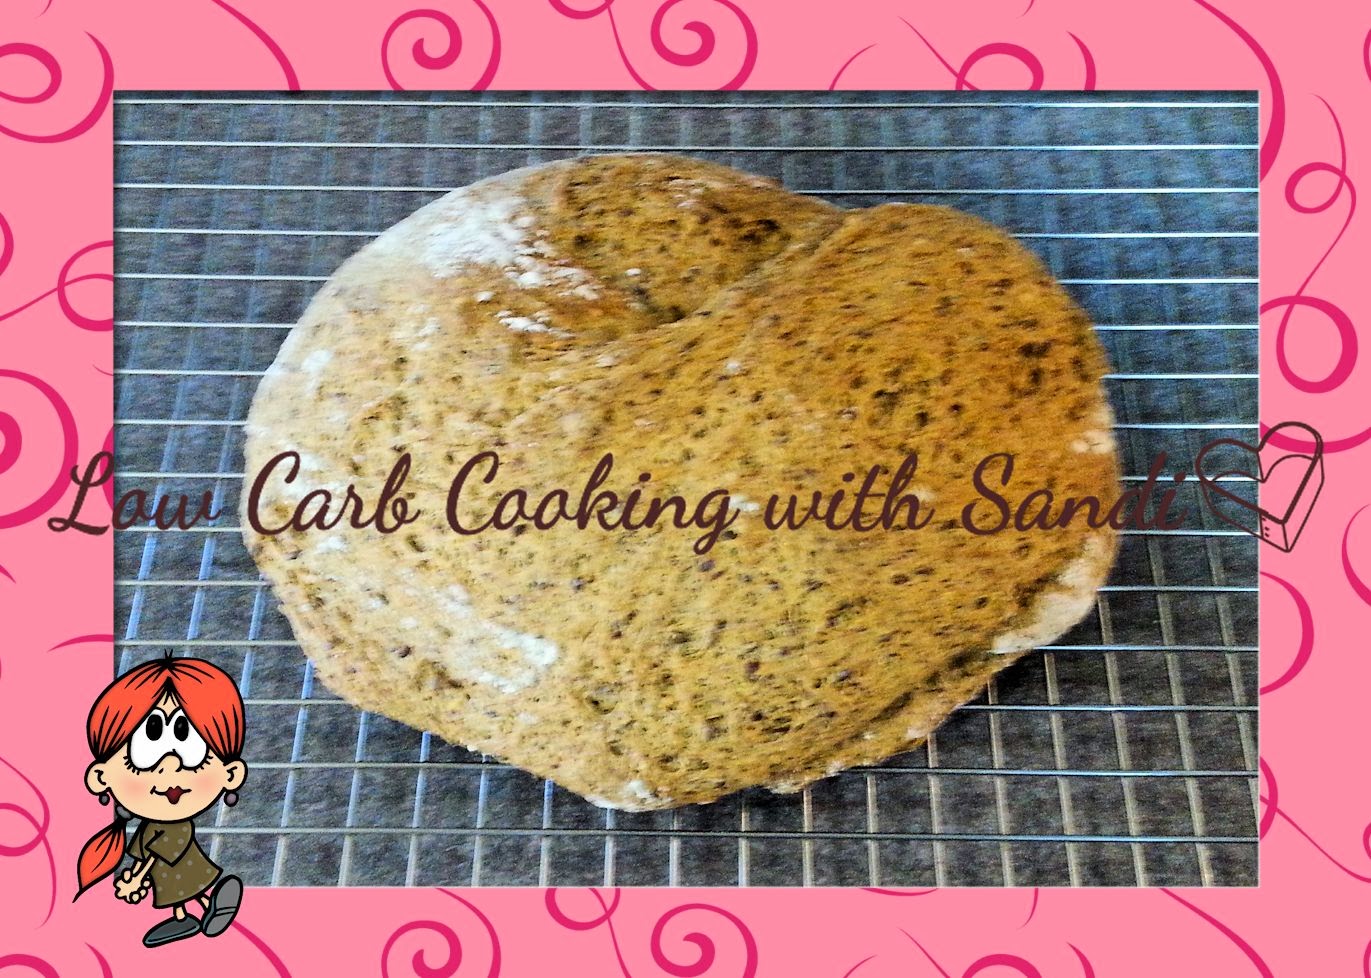
3 Crusty Breads (NO KNEAD)

Multi-Grain

Pepperoni & Mozzarella

Sliced View

White

The Mulit-grain was made as a full loaf. The White was divided in half, and one half had pepperoni and shredded mozzarella added to it. I can't decide which one I like the best, but the multi-grain is slightly leading the pack!
This will probably be it for awhile making crusty breads. I'm going to try making regular loaf pan bread, but following the no-knead method as described below. My shapes are not consistent with the crusty bread, since the dough spreads out in the cast iron pot. At least with a loaf pan it only has one way to go, and that is in height!

INGREDIENTS
3 cups Multi-Grain OR White bread flour (from Low Carb Foods)
1 teaspoon Fine Sea Salt
1/2 teaspoon instant or rapid rise yeast
1 1/2 cups water
2 heaping Tablespoons melted Spectrum Organic Shortening (non-hydrogenated)

DIRECTIONS
In a large mixing bowl, whisk together flour, salt, and yeast. Add water and melted shortening, and mix until a shaggy mixture forms. Cover bowl with plastic wrap and set aside for 18 hours. DO NOT REFRIGERATE. I made mine at 3 P.M. and it was ready the next morning at 9 A.M. to get it into the oven.
Heat oven to 450° F, but first add your cast iron pot with lid on it, into the cold oven. When the oven reaches temperature, start timing for 30 minutes.
While it's heating, pour dough onto a heavily floured surface and shape into a ball. You can cover it with the same plastic wrap that was on your bowl. Let it sit there undisturbed until the oven is ready.
Remove HOT pot from the oven and drop in the dough. Cover and return to the oven for 30 minutes. After 30 minutes, remove the lid and bake an additional 15 minutes. Remove pot from the oven and place the bread on a cooling rack. Once it's cooled down, you can slice it with a serrated edged knife.

NOTES
My calculations in carb count is for the Multi-Grain recipe. Total carbs is 12g. I got 12 slices, including the 2 heel ends. The bigger slices should be approximately 1.2g.
Basically, it all depends on how many slices you can get out of the recipe. 
The full recipe of the White (both breads) would be 24g carbs. I would imagine that you could get 6 slices out of the white and 6 out of the pepperoni & mozzarella. Roughly 2g per slice.


To print this recipe, follow the instructions on my sidebar and go to Print Friendly!

Wednesday, October 23, 2013

Low Carb Fudgsicles (REVISED)


Super easy recipe for low carb fudgsicles in ice pop molds!

Ingredients:
1 1/4 cups of canned coconut milk (unsweetened)
1/2 cup heavy whipping cream
3 Tbsp unsweetened cocoa powder
1/8 tsp salt
4 1/2 Tbsp Swerve or other granular sweetener
6 drops Liquid Sucralose (EZ-Sweet)
3/4 tsp vanilla extract
1 square ChocoPerfection European Dark bar shaved (Optional)


Directions:
In a medium bowl add all of the ingredients. Mix with an electric hand mixer on low until well combined. Switch to a high speed for 2 minutes to make it light and airy.
Pour mixture into ice pop molds.

Notes:
Yield - 6 servings
Net carbs based on what I used is 2.4g per fudgsicle
Each mold holds slightly less than 1/2 cup

Optional: Add some chopped hazelnuts, walnuts, or any other chopped nut. First, add some of the chocolate mixture into the molds, then add  a small amount of chopped nuts. Finish with more chocolate mixture in the molds. The fudgsicle will release easier from the mold if the nuts are hidden within the mix.


To print this recipe, follow the instructions on my sidebar and go to Print Friendly!

Saturday, August 24, 2013

Lemon Cream Cheese Cups - Low Carb (UPDATED)


I liked my Cannoli Cups recipe a lot, so I decided to make the crust again from that recipe, but using a different filling. This filling is another easy one with only 4 ingredients. Although the crust makes 24 mini muffin cups, half of them were filled with the Cannoli cream, and the other half were filled with the Lemon Cream Cheese mixture. The amounts for the mixture here are based on 12 mini muffin cups crust.

Ingredients (updated)
  • 4 oz cream cheese (full fat) room temperature (8 oz for pie filling)
  • 1 Tbsp lemon juice (2 Tbsp for pie filling)
  • 3 Tbsps Swerve or granular erythritol (6 Tbsp for pie filling)
  • 1/4 cup plus 1 Tbsp heavy whipping cream (1/2 cup for pie filling)
Directions (updated)
  1. In a bowl, beat all ingredients with a hand mixer until smooth.
  2. Pipe or spoon into the 12 mini crust cups. There might be some mixture remaining, refrigerate and save it for later, or dive right on in (that's what I did!).
Notes
Each Lemon Cream Cheese Cup has 1.4g net carbs.
My original directions called for whipping the heavy cream in a separate bowl and then folding into the rest of the ingredients. Today I made this as a pie and forgot to do that step. Instead, everything was mixed in one bowl, and I'm happy to say that the filling tastes even better and much lighter than my original!


To print this recipe, follow the instructions on my sidebar and go to Print Friendly!

Friday, August 9, 2013

Another Cannoli Cream Creation!


Yep, that's right, it's only 3 slices of pie! I forgot to take a pic of it before taking it to my get-together with my sister Pattie, niece Stephanie, Cassidy (great-niece), and Gavin (great-nephew). The kids split a slice, and the adults all had one. It went over big, and I am so thrilled that my husband, Frank, loved it too!
Use the same crust recipe and for the filling add an additional 1/3 recipe ingredients, or you could double it and save any extra filling. Hmm, maybe putting it inside a cupcake, oh yes!
My husband liked it so much that he asked what else I could make. So, I'm making another pie crust right now, and will fill it with the Lemon Cream Cheese filling, but I'll double it since that amount is only for 12 mini-muffin cups.

Notes
Yield - 8 slices
Per slice 4.5g net carb.  Slice it smaller and you can cut the carbs more!


Sunday, July 14, 2013

Cannoli Cups - Low Carb


Yay, my first post on my new blog! 
I'm on a quest to find, or come up with, recipes that are very low carb. For some reason I keep heading to the sweeter side of recipes. Maybe because it's harder to come up with great tasting low carb sweet things!
I accidentally got a lucky break Thursday when shopping for Swerve Sweetener. Looking at their website on Wednesday, I noticed they were out of stock for the Swerve Confectioner's Sweetener, so I decided to wait a day to see if it would be back in stock. When I checked again on Thursday, I noticed the Retailer tab and was happy to find that my local health food store carried Swerve. Instead of just driving over there, I gave them a call to see if they indeed carried it. Well, as it turned out, they had all of their supply on the 50% off rack!! They decided to discontinue carrying it due to lack of sales. Needless to say I hopped in my car and went right on over. I bought 4 one pound bags of the granular, and 1 one pound bag of the confectioner's. Total cost was $28, what a bargain! The big plus is that I've never used Swerve before, and I really like it. I might go back and buy some more of the granular since they had a lot on the discount rack.
A lot of cannoli's that I've had in the past, were always too sweet for my taste, so I stayed away from them. Back in the 1980's, there was a small Italian restaurant (it was actually a house) called Enza's in Hawthorne, New Jersey, and they had the best cannoli's I ever had in my life. They were light and not really that sweet. It was almost as if they used a lot more ricotta than mascarpone for the filling. They have been out of business for a very long time, so there is nobody to verify their recipe.
Without further ado, let's get into the recipe.

Ingredients

CANNOLI FILLING for mini cups or as a pie filling:
  • 1 cup of whole milk Ricotta cheese (1 1/3 cup for pie filling)
  • 1/3 cup of Mascarpone (BelGioiso® or other zero carb brand) (1/2 cup for pie filling)
  • 1/4 cup + 1 Tbsp of Swerve Confectioner's Sweetener (1/3 cup for pie filling)
  • 1/4 cup of sugar-free mini choc chips (1/3 cup for pie filling)
CRUST:
  • 1 cup blanched almond flour
  • 1/4 cup Bob's Red Mill Gluten-Free All Purpose Baking Flour
  • 2 Tbsp Swerve granulated sweetener or granulated erythritol
  • 1 tsp guar or xanthan gum
  • 1/4 tsp salt
  • 1/4 cup butter, well-chilled and cut into small chunks
  • 2 to 4 Tbsp ice water
Directions
  1. Preheat oven to 350°F and line a mini muffin pan (24 count) with parchment liners.* (Update: I made these again and sprayed the pan instead of using the liners, it worked just fine)
  2. For the crust, combine almond flour, GF all purpose flour, Swerve, xanthan gum, and salt, in a food processor. Pulse to combine.
  3. Sprinkle butter in, and pulse until mixture resembles coarse crumbs.
  4. With processor running on low, add ice water 1 tablespoon at a time, until dough begins to clump together.
  5. Cover work surface with a large sheet of parchment paper and sprinkle with almond flour. Turn out dough and form into a disk.
  6. Sprinkle with additional almond flour and top with another piece of parchment, then carefully roll out in all directions to form a 10-inch circle.
  7. Remove top parchment and use a circle cookie cutter (or a small drinking glass works too) that measures 2 inches across. This size works perfect for the mini muffin pan. Cut as many circles as you can, then gently lift circles with an offset spatula, and press down into the liners.
  8. With the remaining scraps, you could just cut pieces and press them into the liners if there are only a few cups left to fill. Or re-roll the scraps and cut more circles.
  9. Poke some holes in the bottom of crust with a fork.
  10. Bake 10 to 13 minutes or until pastry is light golden brown. Let cool completely in pan before adding the cannoli cream filling.
  11. For the filling, in a small bowl add the ricotta, Mascarpone, and Swerve. Add the sugar free chocolate chips. With a hand mixer, beat all together until it is nice and creamy smooth.
  12. Put the mixture into a pastry bag, or improvise and make your own, and pipe the filling into the cooled mini cups. Keep refrigerated!
* The parchment paper and muffin liners that I use and highly recommend are unbleached and chlorine free, from a company called If You Care®.

Notes
Yield - 24 mini Cannoli Cups
Based on the ingredients I used: For the full crust = 27g net carbs and full amount of filling = 8.8g net carbs.
Each Cannoli Cup is 1.5g net carb, and that's low enough to have 2 Servings, yay!!


To print this recipe, follow the instructions on my sidebar and go to Print Friendly!