Showing posts with label Swerve. Show all posts

Tuesday, November 18, 2014

Low Carb Sugar Free Jello Cupcakes


I remember my Aunt Ann making a sheet cake that she poked holes in, then poured Jello on top. After it was refrigerated, whipped cream was then added. Whenever we went over to her house, it's something that I looked forward to, that Jello Poke Cake. I never knew what it was called until recently when I stumbled on a recipe through the Internet.
So, to make it low carb was easy, since I already had the cupcake recipe. For the topping I went with my Lemon Cream Cheese pie filling, instead of whipped cream. My husband, who doesn't like my low carb baked goods, loved this!
Monday night we went out to dinner with family, and I brought some of the cupcakes with me to have at their house for dessert. They all agreed that you wouldn't know that they were Low Carb!
It really makes me happy when one of my recipes is well-liked from non-low carbers.

Ingredients for the Cupcake:
1 stick of butter, softened (1/2 cup)
1/2 package of full fat cream cheese, softened (4 ounces)
1/4 tsp EZ-Sweetz Liquid Sucralose
3 Jumbo eggs
1/2 cup Liquid Egg Whites (from a carton)
2 tsps Vanilla extract
1 and 1/2 cups plus 2 Tbsp Almond Flour
1 tsp baking powder
1/8 tsp salt
Zest of a lemon to equal 1/8 tsp

Instructions:
1 - Preheat oven to 350°. Prepare your muffin pan, regular size, with cupcake liners. I use unbleached parchment liners that do not stick.
2 - With a hand-held electric mixer, beat the butter, cream cheese, and sweeteners until smooth.
3 - Add all of the remaining ingredients and mix well.
4 - Spoon mixture into the liners about 3/4 of the way full. I got 11 cupcakes out of the mix.
5 - Bake at 30 to 35 minutes. Since ovens are different, start checking at 27 minutes until the tops are golden brown.

While the cupcakes are in the oven, mix a 3-ounce box of Sugar Free Raspberry Jello with 1 cup of boiling water. Keep stirring for 2 minutes to make sure all is dissolved.
When the cupcakes are done, remove from oven and place the muffin pan on a rack. Let them cool for 10 minutes.
After they've cooled, poke holes with a fork, I hit 6 spots of the top and the cupcakes were nicely soaked with the Jello. Okay, pour (or spoon) the Jello carefully over the cupcake tops, it will seep into the holes. There might be some remaining Jello, if you want to add an equal amount of cold water, maybe you could get some servings of Jello. I dumped mine, since there wasn't a lot of it.
Refrigerate the entire pan for 30 minutes. After that time, remove them from the pan.
While the cupcakes are in the refrigerator, you could go ahead and make the Lemon Cream Cheese topping. OR you could whip up some heavy cream with a little sweetener for the tops. It's up to you.

Lemon Cream Cheese Topping:
8 ounces of full fat cream cheese at room temperature
2 Tbsp fresh lemon juice
1/2 cup of heavy whipping cream

You'll need 2 bowls, one medium sized and the other one small.
In the medium bowl, beat the cream cheese, lemon juice, and sweetener with a hand mixer until smooth.
In the small bowl, whip the heavy whipping cream to soft peaks.
Fold the whipped cream into the cream cheese mixture. (If it seems too thick, just add more of heavy cream straight into the mix. Blend with the hand mixer until you have the consistency you want)
Spoon onto the refrigerated cupcakes, after you've removed them from the muffin pan.
Place in an airtight container and keep refrigerated.

Notes:
Total servings - 11 cupcakes at 24g net carbs with Lemon Cream Cheese Topping
Per serving - 1 cupcake at 2.2g net carbs
If using whipped cream instead of the Lemon Cream Cheese Topping, the carb count drops to 1.5g net carb per serving/cupcake.


Wednesday, September 24, 2014

Rustic Apple Pie - Medium Carb Count


If 10.5g net carbs per serving sounds like a lot to you, then this recipe isn't for you. Since I've started walking in the mornings after breakfast, I'm finding that I can handle slightly higher carbs. I also walk in place after lunch and dinner for 10 minutes. It helps to play some music when I do this, and before you know it I find myself dancing! My doctor changed one of my oral diabetic pills to Invokana around 5 months ago. This might also be contributing to my constant lower fasting glucose. I range from 90 to 130 in the mornings before breakfast, and I don't really test at other times of the day, unless I feel a little off. Right now I'm really happy that I've been able to be adding some more carbs, but I don't go overboard!
I have to do some more research on what fruits have lower carbs, so that I can make more pies!!
Anyway, since the crust I use bakes up quickly in the oven, I had to cook my apple filling on the stove top. I'm really happy with the taste of this one. The slices come out smaller than a standard pie, so next time I may make the crust in a pie pan, and add the cooked apples when the crust is almost done. The amount of carbs would stay the same, but the slices would be bigger!

APPLE FILLING:
  • 3 small Granny Smith apples
  • 1 1/2 Tbsp lemon juice
  • 1 Tbsp butter
  • 1 1/2 tsp Swerve Granulated sweetener or granulated erythritol
  • 3 drops of EZ- Sweetz Liquid Sucralose
  • 3/4 tsp Vanilla Extract
  • 1/2 tsp ground cinnamon
  • Pinch of ground nutmeg
COOKING DIRECTIONS:
Core and slice apples into 1/2 inch thick slices. Place slices in a bowl and pour lemon juice over apples and mix to coat well. Set them aside.
In a 12-inch nonstick skillet, melt butter over medium-high heat. Stir in sweeteners and extract. Add apple slices, turning to coat with mixture. Sprinkle with cinnamon and nutmeg.
Cover and cook until apple slices are soft, about 2 to 3 minutes. Test one of the slices at 2 minutes, if it still has a little crunch to it, cook a little longer since the time in the oven is minimal.
Remove from the heat and let it cool completely before adding to your unbaked pie crust at Step #8 below in the Directions!


PIE CRUST:
  • 1 cup blanched almond flour (Honeyville)
  • 1/4 cup Bob's Red Mill Gluten-Free All Purpose Baking Flour
  • 2 Tbsp Swerve granulated sweetener or granulated erythritol
  • 1 tsp guar or xanthan gum
  • 1/4 tsp salt
  • 1/4 cup butter, well-chilled and cut into small chunks
  • 2 to 4 Tbsp ice water
Directions:
1.     Preheat oven to 350°F.
2.     For the crust, combine almond flour, GF all purpose flour, Swerve, xanthan gum, and salt, in a food processor. Pulse to combine.
3.     Sprinkle butter in, and pulse until mixture resembles coarse crumbs.
4.     With processor running on low, add ice water 1 tablespoon at a time, until dough begins to clump together. 2 Tbs worked for me.
5.     Cover work surface with a large sheet of parchment paper and sprinkle with almond flour. Turn out dough and form into a square (or disk for a pie).
6.     Sprinkle with additional almond flour and top with another piece of parchment, then carefully roll out in all directions to form a 10 to 11 inch circle.
7.     Poke some holes in the bottom of crust with a fork.
8.     Add the cooled apple filling and carefully fold up the edges as shown in the photo.
9.     Bake 20 to 25 minutes, so that the top browns, but watch the bottom doesn't burn! Cool on rack when done.

Optional: A bit of whipped cream on top is heavenly. I store my leftover pie in the refrigerator. When I'm ready to serve, I put a slice in the microwave, covered, for 15 seconds to warm it up, then top with a sprinkle of Confectioner's Swerve and some whipped cream. Oh Boy it's good!

Notes:
Total carbs for entire recipe is 84.3g net carbs. If slicing into 8ths, per serving is 10.5g net carbs.


To print this recipe, follow the instructions on my sidebar and go to Print Friendly!

Thursday, May 22, 2014

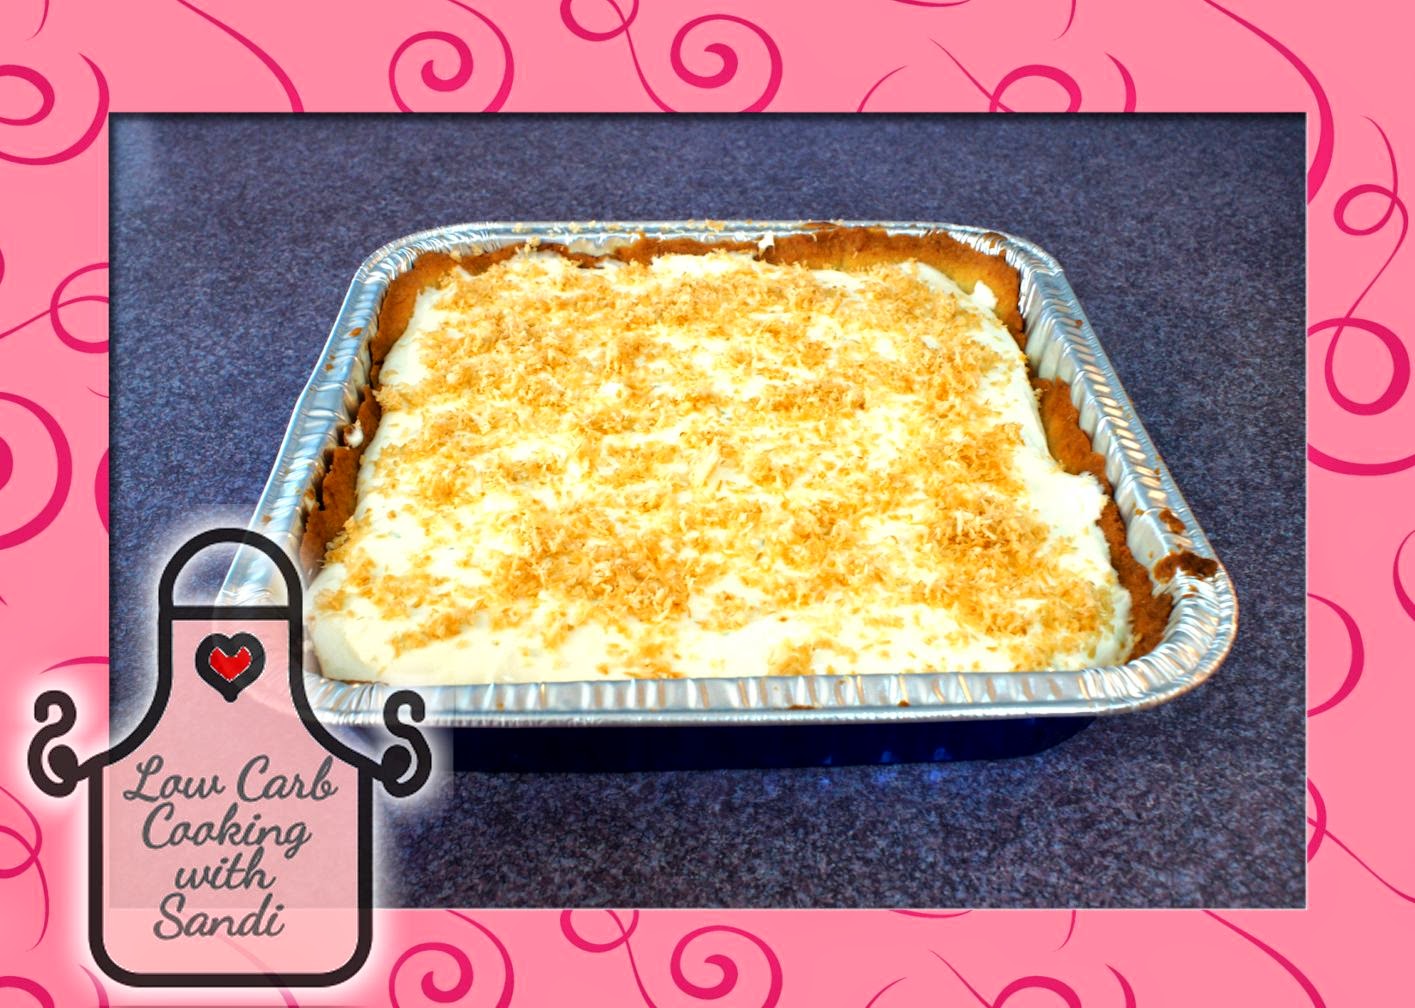
Coconut Lime Cream Cheese Squares - Low Carb


On May 3rd, we went to a Kentucky Derby party at our nephew's house. Besides bringing my low carb Maple Walnut Chocolate Chip Biscotti (recipe not updated yet) we also brought this low carb dessert. I could have made a pie, but since there were a lot of people I went with squares and cut 16 small pieces out of this 8 by 8 pan. I cut them in 4 one direction, then turned the pan and cut into another 4 pieces.


PIE CRUST:
  • 1 cup blanched almond flour (Honeyville)
  • 1/4 cup Bob's Red Mill Gluten-Free All Purpose Baking Flour
  • 2 Tbsp Swerve granulated sweetener or granulated erythritol
  • 1 tsp guar or xanthan gum
  • 1/4 tsp salt
  • 1/4 cup butter, well-chilled and cut into small chunks
  • 2 to 4 Tbsp ice water
Directions
1.     Preheat oven to 350°F.
2.     For the crust, combine almond flour, GF all purpose flour, Swerve, xanthan gum, and salt, in a food processor. Pulse to combine.
3.     Sprinkle butter in, and pulse until mixture resembles coarse crumbs.
4.     With processor running on low, add ice water 1 tablespoon at a time, until dough begins to clump together. 2 Tbs worked for me.
5.     Cover work surface with a large sheet of parchment paper and sprinkle with almond flour. Turn out dough and form into a square (or disk for a pie).
6.     Sprinkle with additional almond flour and top with another piece of parchment, then carefully roll out in all directions to form a 9 by 9 inch square (or 10-inch circle for a pie).
7.     Place in 8 by 8 pan (or a pie tin).
8.     Poke some holes in the bottom of crust with a fork.
9.     Bake 13 to 15 minutes. If you can cover the crust edges with foil after they have browned, you can add more time to let the bottom of the crust get slightly brown. Cool on rack when done. 

Ingredients for Filling
  • 12 oz cream cheese (full fat) room temperature 
  • 1 Lime, juiced 
  • 9 Tbsps Swerve or granular erythritol 
  • 3/4 cup heavy whipping cream
Directions
1.     In a bowl, beat the cream cheese, lime juice, and sweetener, with a hand mixer until smooth.
2.     In a separate bowl, whip the heavy whipping cream.
3.     Fold the whipped cream into the cream cheese mixture.
4.     Scoop into the cooled down crust. Refrigerate for 2 hours or more.

Optional:
Top with toasted coconut before refrigerating. On a sheet pan, spread out 1/4 cup of unsweetened fine coconut. Toast for 2 to 3 minutes in a 350° oven. Be careful not to burn the coconut. Remove from oven and let it cool. After it has cooled, place in a bowl and add 1 to 2 tablespoons of cold water and mix until moist. Add 1 teaspoon of powdered erythritol and 1 drop of E-Z Sweetz liquid sucralose and mix well. Whatever amount doesn't get used, keep the remainder in an airtight container in the refrigerator.

Notes
Total carbs is 33.6g for the entire recipe. If cutting into 16 squares, each square would be 2.1g. If making a pie and cutting into 8 slices, the carb count would be 4.2g per slice.


To print this recipe, follow the instructions on my sidebar and go to Print Friendly!

Wednesday, March 12, 2014

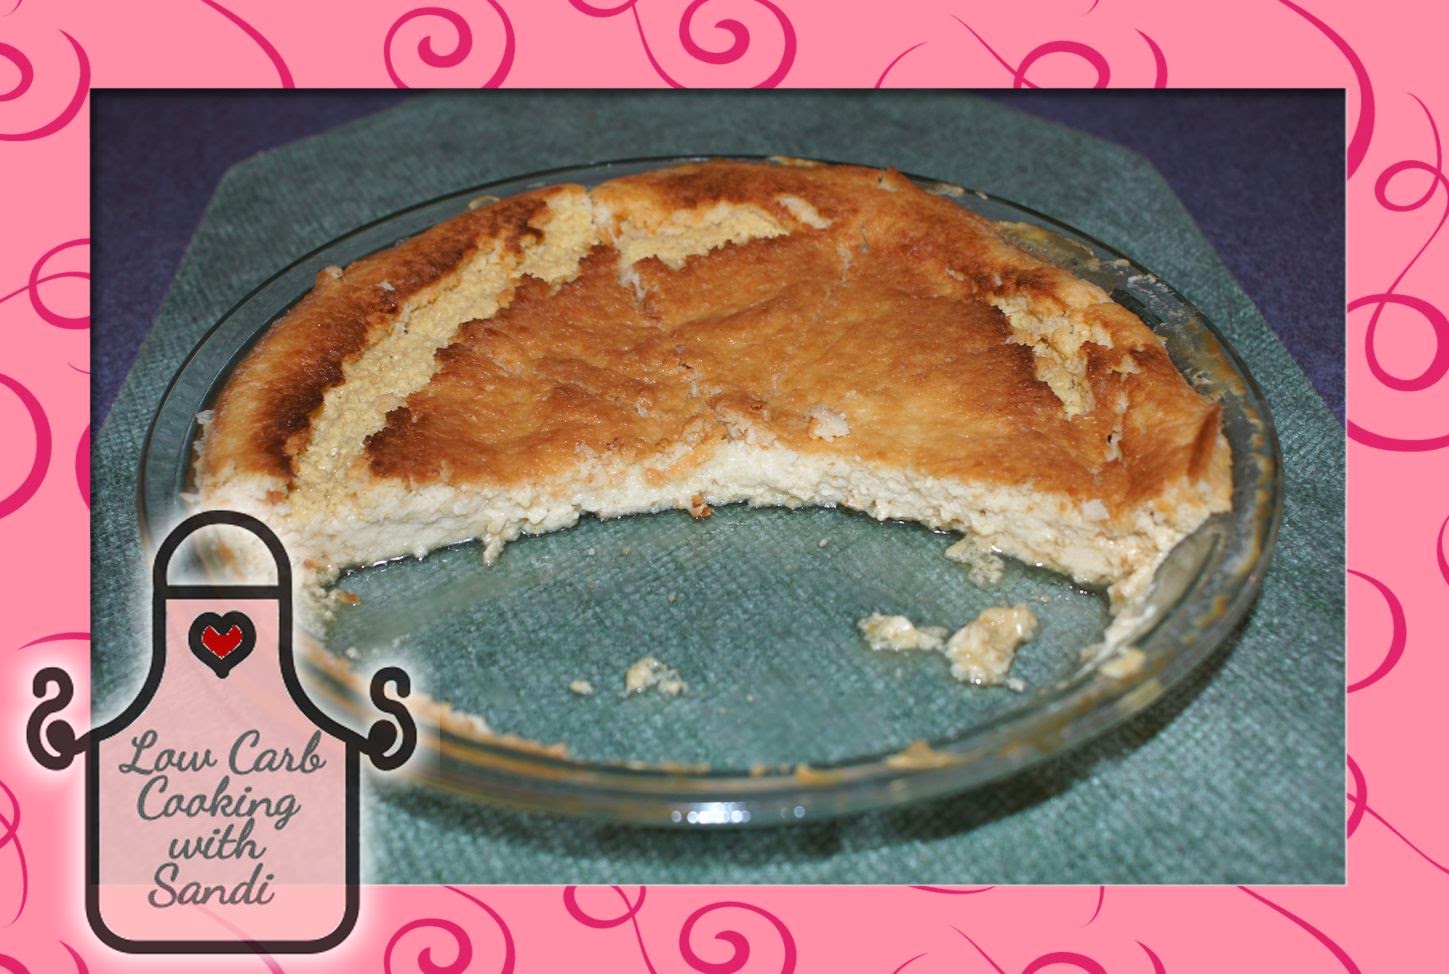
"Not So Impossible" Coconut Pie


Five slices remain after my husband, Frank, got a taste of it. I had 1 slice, and he had 2!
This morning when I went into the kitchen, I saw a note from Frank with a happy face ☺saying "The pie was GREAT!". To get a note, he must really like it!!
He's my recipe tester, if he likes it, everybody will like it. He's very difficult when it comes to eating healthy, the low-carb way, but he's slowly getting there.
I adapted this recipe from Barbo's Kitchen (a friend of Jennifer Eloff). I tried it a couple of days ago by making 1/2 the recipe and putting them in a muffin tin. They tasted good, so I knew I would be making it again really soon, but in a pie plate with the full recipe.
My sister reminded me that our Mom used to make the original Impossible Pie using Bisquick mix. I do remember eating it, but cannot recall how it was made.
At 1.2g carbs per serving, my version works really well as a low carb dessert!

INGREDIENTS:
1 cup of Better than Eggs (or 4 eggs)
3 Tbsp melted butter
3/4 cup of heavy whipping cream
1 and 1/4 cup of water
a Pinch of Sea Salt
1/4 cup Biscuit Mix from LC Foods Corp
1/4 tsp Liquid Sweetener (I used E-Z Sweetz liquid Sucralose)
2 tsp vanilla
3/4 cup unsweetened finely grated coconut

DIRECTIONS:
Preheat oven to 350° F.
Using a blender, put all EXCEPT the coconut in and mix until smooth. Add the coconut and stir into batter. Spray a  9" pie plate with a cooking spray. Pour the batter into the greased pie dish and bake for 50 to 60 minutes, or until custard in the center is firm.
Once it's cooled down, place it in the refrigerator to store it. Whipped Cream goes nicely on a slice of this pie!

Notes:
The entire pie is 9.5g carbs, based on the ingredients that I used.
If you slice into 8 servings, each serving would be approximately 1.2g carbs.


To print this recipe, follow the instructions on my sidebar and go to Print Friendly!

Sunday, December 1, 2013

Low Carb Black Forest Cheesecake Cupcakes


This came out better than I had expected! I don't know if it should be called Black Forest, since I think that uses cherries on top. Mine has strawberry preserves, reduced on the stove of course. Maybe it should be called 'Toms River Black Forest Cheesecake Cupcakes', just kidding!
The original recipe is from Cooking Classy.
My friend, Judy Bennett, had posted it on a Facebook group page 'My favorite recipe's'. So I set out to reformulate this to be low carb, as much as possible. *Some ingredients that I used were Reduced Fat, but you could use the full fat and end up with slightly less carbs. ALSO, I have eliminated the crust portion of the original recipe.

Ingredients:
CHEESECAKE
3 ounces Baker's unsweetened chocolate (for the melted chocolate part of recipe)
5 Tablespoons of granulated Swerve (for the melted chocolate part of recipe)
5 Tablespoons of Heavy Whipping Cream (for the melted chocolate part of recipe)
1/2 cup + 1 Tablespoon of granulated Swerve
2 Tablespoons of unsweetened cocoa powder (sifted)
1 pinch of salt
12 ounces of cream cheese, softened well (Reduced Fat)
2 large eggs
1 teaspoon vanilla extract
1/4 cup heavy whipping cream
1/4 cup of sour cream (Reduced Fat)

WHIPPED TOPPING
1 + 1/4 cups heavy whipping cream
1 + 1/2 Tablespoons granulated Swerve

FRUIT TOPPING
3 Tablespoons Polaner Sugar-Free + Fiber Strawberry Preserves
Splash of heavy whipping cream

Directions:
FOR THE CHEESECAKE FILLING
Preheat oven to 325° F.
In a mixing bowl, whisk together 1/2 cup + 1 Tbsp Swerve, sifted cocoa, and salt, until no clumps of cocoa remain. There shouldn't be any since you sifted the cocoa! Add cream cheese to a mixing bowl and pour sweetener mixture over cream cheese, then using an electric hand mixer set on low speed, whip mixture just until smooth. Mix in eggs one at a time, blending just until combined after each addition and adding in vanilla with second egg. Let that sit while you melt your chocolate. Put the Baker's chocolate in a small saucepan over a low flame. Keep stirring while it's melting. Add the 5 Tbsp of Swerve and stir it well to incorporate. Once it's melted and mixed well, add the 5 Tbsp heavy whipping cream until smooth. Let it cool slightly, then add to the ingredients already mixed. Mix until just combined, then add 1/4 cup heavy whipping cream and sour cream and mix just until combined. Forcefully tap bowl against the countertop, about 30 times to release some of the air bubbles. Divide mixture among 12 cupcake liners in a muffin pan, adding a slightly heaping 1/4 cup to each. I highly recommend the liners I use from If You Care and look for the Where to Buy link at the top of their page. Bake in 325° F oven 17 - 21 minutes until centers only jiggle slightly. (My oven was the full 21 minutes). Remove from oven and allow to cool at room temperature 1 hour, then cover with plastic wrap and refrigerate 2 hours.

FOR THE WHIPPED TOPPING
Note - It's preferably best to add the whipped topping 2 hours before serving.
In a mixing bowl, using an electric hand mixer, 1 + 1/4 cups of heavy whipping cream until soft peaks form, then add 1 + 1/2 Tbsp of Swerve and whip until stiff peaks form. Pipe or spread the whipped cream into an even layer over the cupcakes, then pipe a rim around edge over that layer (or if spreading whipped cream, just create a small well into the center).

FOR THE FRUIT TOPPING
Let this cool before adding on top of the whipped cream layer.
Place 3 Tbsp of the strawberry preserves into a small saucepan. Heat over low flame until it starts to slightly liquefy. Leave some of the strawberry chunks solid. Turn off the flame and put a splash of heavy whipping cream in and mix well. Once this is cool, spoon a heaping teaspoon into the center of each. Store in the refrigerator in an airtight container.

Notes:
Total carb count for entire recipe based on *my ingredients used is 42g net carbs. YIELD: 12 cupcakes, 3.5g net carbs per cupcake.


To print this recipe, follow the instructions on my sidebar and go to Print Friendly!

Peanut Butter Chocolate Balls


Super easy, super good, and Low Carb!! The original recipe from Taste of Home is titled 'Peanut Butter Snowballs' using white chocolate. I don't have any sugar-free white chocolate, so I figured mine would be more like a Reese's Peanut Butter Cup. They are, but they are so much better!!
My friend, Judy Bennett, had the original recipe posted on a Facebook group 'My favorite recipe's'.

Ingredients:
1/2 cup chunky Peanut Butter (Smucker's Natural)
3 Tablespoons softened butter (super softened!)

Directions:
In a bowl, combine the sweetener, peanut butter, and butter. Since I use natural peanut butter, I had to put my mixture into the refrigerator until it was firm enough to form balls. I think an hour is good enough, if it's not forming balls easily put it back in the refrigerator for some more time.
When firm enough, form the balls, maybe 3/4 to 1 inch and place on waxed paper-lined cookie sheet. Chill for 30 minutes or until nice and firm.
Next, melt the chocolate in a microwave-safe bowl. Heat on high at 30-second intervals, stirring each time until melted. Using two forks, dip balls and place on waxed paper to harden.
I have mine stored in the refrigerator at all times.
You should be able to get at least 18 to 24.

Notes:
Total carbs for the ingredients I used is 18g net carbs. This should give you 1g or less per ball depending on how many you get out of this recipe.


To print this recipe, follow the instructions on my sidebar and go to Print Friendly!

Monday, November 18, 2013

Maple Walnut Biscotti


Tomorrow is my Birthday, and I needed to whip up some snacks, so I don't get tempted to indulge in the carby desserts.
Okay, so I think I've come up with my new favorite flavor for biscotti. I passed on making a glaze for this, just in case I want to dip this into my coffee!

Ingredients
2 cups Almond Flour
1/2 cup Swerve Sweetener (or granulated erythritol)
1 tsp baking powder
1/2 tsp xanthan gum
1/2 cup chopped walnuts (add more if you like it nutty)
1/4 cup melted butter
1 egg, lightly beaten 
1/2 tsp vanilla extract
1/2 tsp maple extract
2 Tbsp Sugar Free Maple Syrup (I use Walden Farms Pancake Syrup)

Directions
Preheat oven to 325°F and line a baking sheet with parchment paper.
In a large bowl, whisk together almond flour, Swerve, baking powder, and xanthan gum.
Stir in the chopped walnuts, melted butter, egg, vanilla extract, maple extract, and Sugar Free Maple syrup, until the dough blends together.
Place dough onto parchment lined baking sheet and form into a flat log 3 inches wide by 11 inches in length. Pat the ends of the length so that the slices will be consistent, sort of making it rectangular instead of rounded ends.
Bake 25 minutes, or until lightly browned and firm to the touch. Remove from oven and let cool for 30 minutes. Reduce oven temperature to 250°F.
When cooled, cut into 14 even slices. Put slices back onto baking sheet cut-side down and bake for 15 minutes, then flip each slice and bake for another 15 minutes. Turn oven off and let biscotti sit inside until cool. I leave my oven door slightly open to cool it down quicker.

Notes
14 Servings. Total net carbs for full recipe is 20g. Figuring 14 servings, each serving would be 1.4g net carbs. These amounts are based on the ingredients that I used.


To print this recipe, follow the instructions on my sidebar and go to Print Friendly!

Wednesday, October 23, 2013

Low Carb Fudgsicles (REVISED)


Super easy recipe for low carb fudgsicles in ice pop molds!

Ingredients:
1 1/4 cups of canned coconut milk (unsweetened)
1/2 cup heavy whipping cream
3 Tbsp unsweetened cocoa powder
1/8 tsp salt
4 1/2 Tbsp Swerve or other granular sweetener
6 drops Liquid Sucralose (EZ-Sweet)
3/4 tsp vanilla extract
1 square ChocoPerfection European Dark bar shaved (Optional)


Directions:
In a medium bowl add all of the ingredients. Mix with an electric hand mixer on low until well combined. Switch to a high speed for 2 minutes to make it light and airy.
Pour mixture into ice pop molds.

Notes:
Yield - 6 servings
Net carbs based on what I used is 2.4g per fudgsicle
Each mold holds slightly less than 1/2 cup

Optional: Add some chopped hazelnuts, walnuts, or any other chopped nut. First, add some of the chocolate mixture into the molds, then add  a small amount of chopped nuts. Finish with more chocolate mixture in the molds. The fudgsicle will release easier from the mold if the nuts are hidden within the mix.


To print this recipe, follow the instructions on my sidebar and go to Print Friendly!

Saturday, August 24, 2013

Lemon Cream Cheese Cups - Low Carb (UPDATED)


I liked my Cannoli Cups recipe a lot, so I decided to make the crust again from that recipe, but using a different filling. This filling is another easy one with only 4 ingredients. Although the crust makes 24 mini muffin cups, half of them were filled with the Cannoli cream, and the other half were filled with the Lemon Cream Cheese mixture. The amounts for the mixture here are based on 12 mini muffin cups crust.

Ingredients (updated)
  • 4 oz cream cheese (full fat) room temperature (8 oz for pie filling)
  • 1 Tbsp lemon juice (2 Tbsp for pie filling)
  • 3 Tbsps Swerve or granular erythritol (6 Tbsp for pie filling)
  • 1/4 cup plus 1 Tbsp heavy whipping cream (1/2 cup for pie filling)
Directions (updated)
  1. In a bowl, beat all ingredients with a hand mixer until smooth.
  2. Pipe or spoon into the 12 mini crust cups. There might be some mixture remaining, refrigerate and save it for later, or dive right on in (that's what I did!).
Notes
Each Lemon Cream Cheese Cup has 1.4g net carbs.
My original directions called for whipping the heavy cream in a separate bowl and then folding into the rest of the ingredients. Today I made this as a pie and forgot to do that step. Instead, everything was mixed in one bowl, and I'm happy to say that the filling tastes even better and much lighter than my original!


To print this recipe, follow the instructions on my sidebar and go to Print Friendly!

Saturday, August 17, 2013

Creamy Fruit Pops with optional Chocolate Hard Shell


I don't know about you, but I am really enjoying my time experimenting with recipes. Today I've got another frozen concoction that's low carb, but not dairy free. I like whipping cream, so if I can incorporate it into a recipe I will. I have no issues with dairy, nor do I have issues with some gluten. Mine is strictly with carbs, the lower the better for me with regards to keeping this Type 2 Diabetes in better control. Now if I can only get my butt moving to go for a walk or something, my readings would be so much better. Hmm, that almost sounds like I'm a psychic doing readings. Although I think I am intuitive I am talking about my glucose readings. Ah, that nasty little finger stick sometimes once a day, sometimes more if I feel a little off.
My favorite fruit is strawberries (really bananas but too many carbs) and quite often my breakfast will be strawberries with whipped cream and chopped walnuts, especially if I don't feel like cooking, or just need to finish what's in the crisper. So, this pop is made with strawberries.
The chocolate that you see is from The Coconut Mama's Magic Shell recipe, however I didn't use honey but subbed with confectioner's Swerve and it worked just fine. I also added a little bit of Walden Farms Pancake Syrup. The syrup was around 1/4 cup, and the confectioner's Swerve was around 3 tablespoons. You have to taste it to see if more sweetener is needed. I'm thinking that the next time I make these, I will just add the chocolate shell after the pop has frozen. The way it is here is quite thick and I didn't enjoy that part as much as I thought. A thinner shell on the outside would have been just enough!

Ingredients:
1/2 of a 12oz. bag Frozen Fruit
7oz. Coconut Milk (unsweetened)
7oz. Heavy Whipping Cream
1 to 2 Tbsp Vanilla Extract
Pinch of Salt

Directions:
Add fruit, coconut milk, salt, and whipping cream to a blender and mix on high until combined.
Add sweetener and vanilla and blend briefly.
Taste the mixture and add more sweetener if needed.
Pour into popsicle molds and freeze for a minimum of 4 hours. Overnight is best!

Notes:
I used frozen strawberries, which my carb count is based on.
6 servings approximately 1/2 cup each mold. Net carbs per serving is 2.8g (not counting the chocolate shell)


To print this recipe, follow the instructions on my sidebar and go to Print Friendly!

Friday, August 9, 2013

Another Cannoli Cream Creation!


Yep, that's right, it's only 3 slices of pie! I forgot to take a pic of it before taking it to my get-together with my sister Pattie, niece Stephanie, Cassidy (great-niece), and Gavin (great-nephew). The kids split a slice, and the adults all had one. It went over big, and I am so thrilled that my husband, Frank, loved it too!
Use the same crust recipe and for the filling add an additional 1/3 recipe ingredients, or you could double it and save any extra filling. Hmm, maybe putting it inside a cupcake, oh yes!
My husband liked it so much that he asked what else I could make. So, I'm making another pie crust right now, and will fill it with the Lemon Cream Cheese filling, but I'll double it since that amount is only for 12 mini-muffin cups.

Notes
Yield - 8 slices
Per slice 4.5g net carb.  Slice it smaller and you can cut the carbs more!


Sunday, July 14, 2013

Cannoli Cups - Low Carb


Yay, my first post on my new blog! 
I'm on a quest to find, or come up with, recipes that are very low carb. For some reason I keep heading to the sweeter side of recipes. Maybe because it's harder to come up with great tasting low carb sweet things!
I accidentally got a lucky break Thursday when shopping for Swerve Sweetener. Looking at their website on Wednesday, I noticed they were out of stock for the Swerve Confectioner's Sweetener, so I decided to wait a day to see if it would be back in stock. When I checked again on Thursday, I noticed the Retailer tab and was happy to find that my local health food store carried Swerve. Instead of just driving over there, I gave them a call to see if they indeed carried it. Well, as it turned out, they had all of their supply on the 50% off rack!! They decided to discontinue carrying it due to lack of sales. Needless to say I hopped in my car and went right on over. I bought 4 one pound bags of the granular, and 1 one pound bag of the confectioner's. Total cost was $28, what a bargain! The big plus is that I've never used Swerve before, and I really like it. I might go back and buy some more of the granular since they had a lot on the discount rack.
A lot of cannoli's that I've had in the past, were always too sweet for my taste, so I stayed away from them. Back in the 1980's, there was a small Italian restaurant (it was actually a house) called Enza's in Hawthorne, New Jersey, and they had the best cannoli's I ever had in my life. They were light and not really that sweet. It was almost as if they used a lot more ricotta than mascarpone for the filling. They have been out of business for a very long time, so there is nobody to verify their recipe.
Without further ado, let's get into the recipe.

Ingredients

CANNOLI FILLING for mini cups or as a pie filling:
  • 1 cup of whole milk Ricotta cheese (1 1/3 cup for pie filling)
  • 1/3 cup of Mascarpone (BelGioiso® or other zero carb brand) (1/2 cup for pie filling)
  • 1/4 cup + 1 Tbsp of Swerve Confectioner's Sweetener (1/3 cup for pie filling)
  • 1/4 cup of sugar-free mini choc chips (1/3 cup for pie filling)
CRUST:
  • 1 cup blanched almond flour
  • 1/4 cup Bob's Red Mill Gluten-Free All Purpose Baking Flour
  • 2 Tbsp Swerve granulated sweetener or granulated erythritol
  • 1 tsp guar or xanthan gum
  • 1/4 tsp salt
  • 1/4 cup butter, well-chilled and cut into small chunks
  • 2 to 4 Tbsp ice water
Directions
  1. Preheat oven to 350°F and line a mini muffin pan (24 count) with parchment liners.* (Update: I made these again and sprayed the pan instead of using the liners, it worked just fine)
  2. For the crust, combine almond flour, GF all purpose flour, Swerve, xanthan gum, and salt, in a food processor. Pulse to combine.
  3. Sprinkle butter in, and pulse until mixture resembles coarse crumbs.
  4. With processor running on low, add ice water 1 tablespoon at a time, until dough begins to clump together.
  5. Cover work surface with a large sheet of parchment paper and sprinkle with almond flour. Turn out dough and form into a disk.
  6. Sprinkle with additional almond flour and top with another piece of parchment, then carefully roll out in all directions to form a 10-inch circle.
  7. Remove top parchment and use a circle cookie cutter (or a small drinking glass works too) that measures 2 inches across. This size works perfect for the mini muffin pan. Cut as many circles as you can, then gently lift circles with an offset spatula, and press down into the liners.
  8. With the remaining scraps, you could just cut pieces and press them into the liners if there are only a few cups left to fill. Or re-roll the scraps and cut more circles.
  9. Poke some holes in the bottom of crust with a fork.
  10. Bake 10 to 13 minutes or until pastry is light golden brown. Let cool completely in pan before adding the cannoli cream filling.
  11. For the filling, in a small bowl add the ricotta, Mascarpone, and Swerve. Add the sugar free chocolate chips. With a hand mixer, beat all together until it is nice and creamy smooth.
  12. Put the mixture into a pastry bag, or improvise and make your own, and pipe the filling into the cooled mini cups. Keep refrigerated!
* The parchment paper and muffin liners that I use and highly recommend are unbleached and chlorine free, from a company called If You Care®.

Notes
Yield - 24 mini Cannoli Cups
Based on the ingredients I used: For the full crust = 27g net carbs and full amount of filling = 8.8g net carbs.
Each Cannoli Cup is 1.5g net carb, and that's low enough to have 2 Servings, yay!!


To print this recipe, follow the instructions on my sidebar and go to Print Friendly!